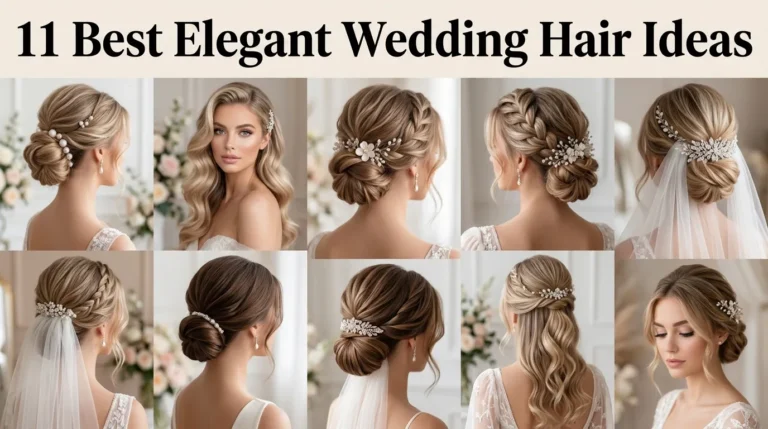
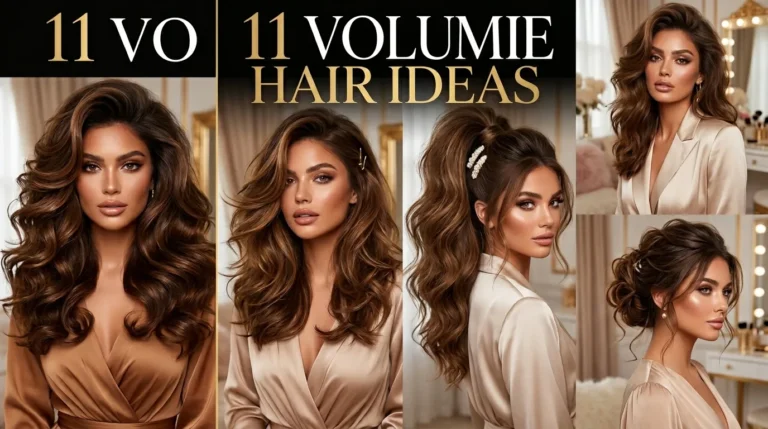
10 Modern Half Up Ideas
A half-up hairstyle is one of those rare beauty choices that feels polished without trying too hard. It works for coffee runs, weddings, workdays, school events, brunch outfits, and quick mirror touch-ups before leaving the house. For USA readers who want Pinterest-worthy hair that still feels realistic, these ideas offer a balance of softness, structure,…
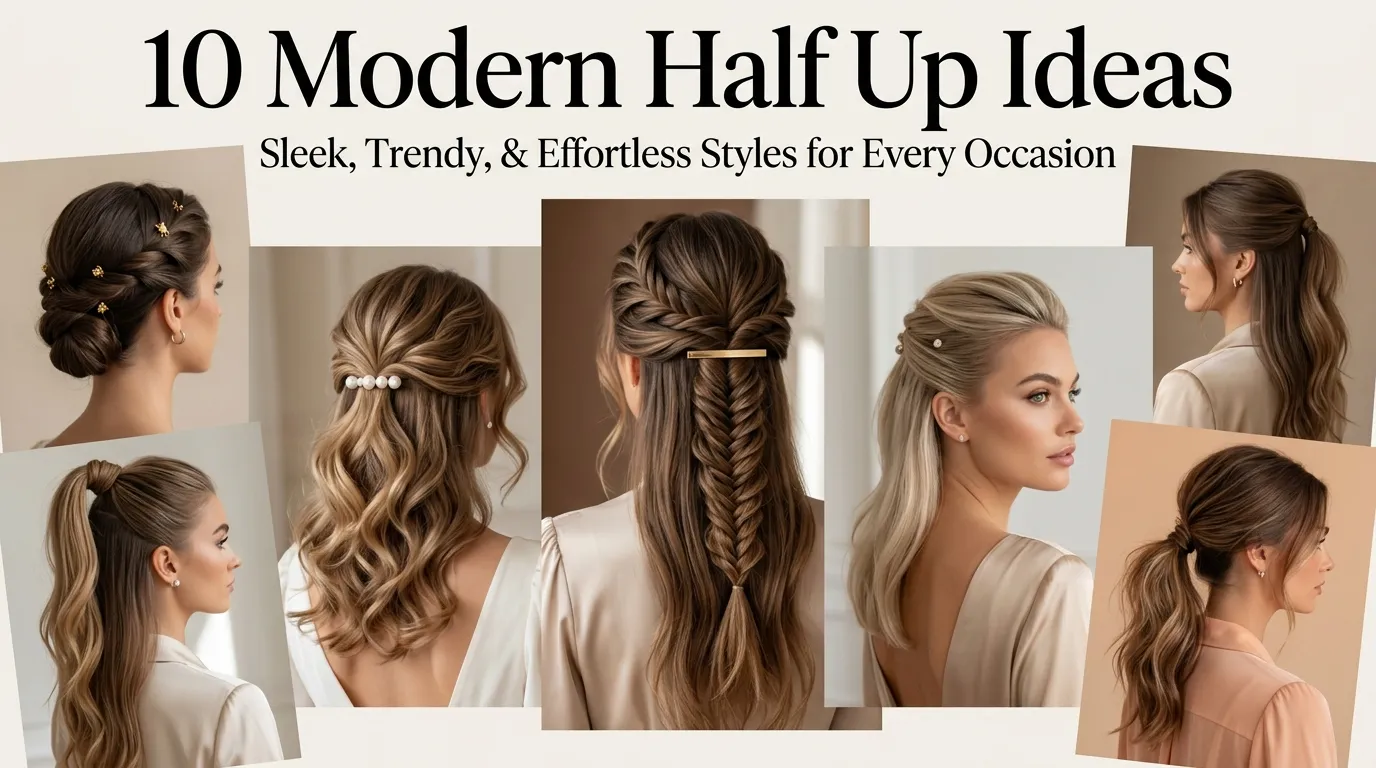
A half-up hairstyle is one of those rare beauty choices that feels polished without trying too hard. It works for coffee runs, weddings, workdays, school events, brunch outfits, and quick mirror touch-ups before leaving the house. For USA readers who want Pinterest-worthy hair that still feels realistic, these ideas offer a balance of softness, structure, and everyday wearability. The best part is that each look can be adapted for straight, wavy, curly, short, medium, or long hair with simple styling changes.
This guide focuses on wearable half-up looks that photograph beautifully and hold up in real life. You will find soft texture, sleek details, romantic accessories, practical styling tips, and easy ways to make each idea feel current. The goal is not to create complicated salon-only hair, but to help you build styles that look intentional from every angle. Use these ideas for casual outfits, date nights, holiday photos, bridal events, senior pictures, or Pinterest boards filled with effortless hair inspiration.
1. Soft Wave Crown
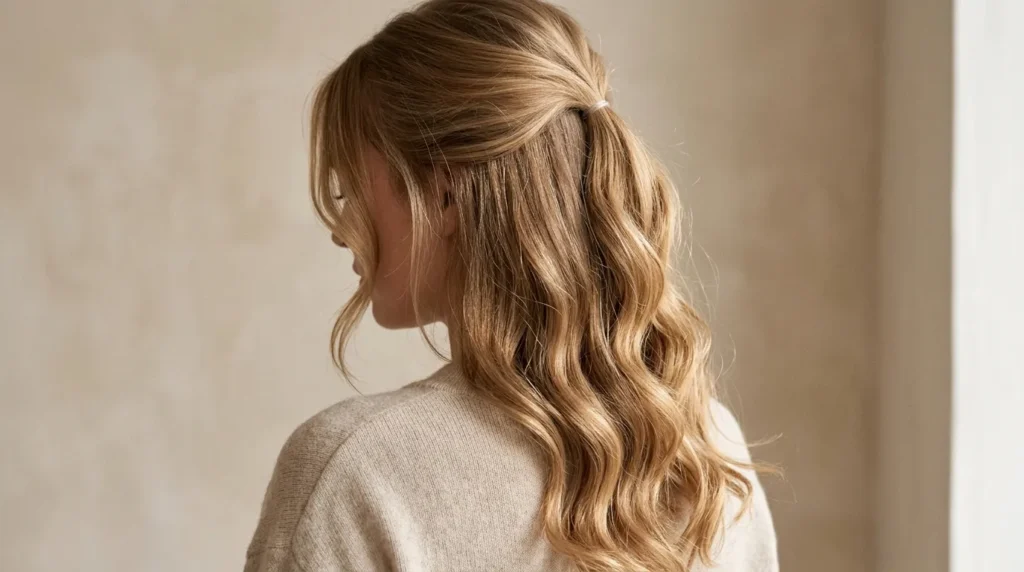
- Adds gentle movement without making the style feel overdone
- Works beautifully with curling irons, hot rollers, or heatless waves
- Keeps hair away from the face while leaving length visible
- Ideal for brunch, engagement photos, weddings, and everyday outfits
Soft waves instantly make a half-up style feel romantic, relaxed, and camera-ready. This idea works because the lifted crown gives shape while the loose waves soften the overall look. Instead of pulling the top section too tightly, gather hair from both sides and secure it near the back of the crown. A few loose pieces around the face create movement and keep the finish natural. In my experience, this style looks best when the waves are brushed out slightly for a softer, more expensive-looking texture.
The transformation comes from the balance between control and softness. Hair looks styled, but not stiff, which makes it perfect for real-life plans where you want to feel comfortable. Use a lightweight texture spray before pinning so the crown section has grip without heaviness. For fine hair, gently tease the crown before securing it. For thick hair, use hidden bobby pins or a small elastic first, then cover the hold with a decorative clip for a cleaner finish.
2. Sleek Clip Lift
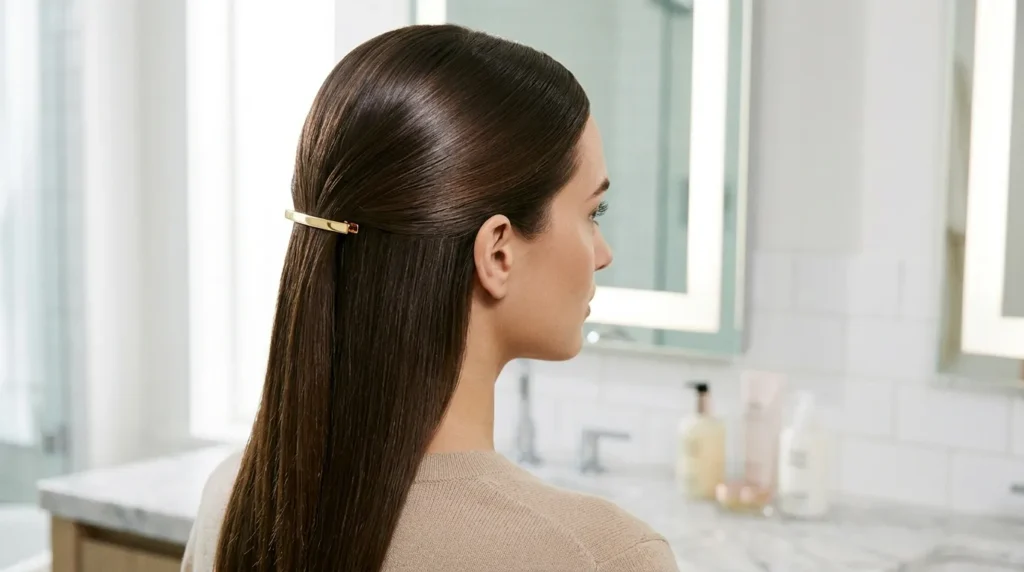
- Creates a clean, polished shape in minutes
- Looks great with straightened or naturally smooth hair
- Helps control flyaways around the crown and sides
- Perfect for work, dinner outfits, and minimalist Pinterest boards
A sleek clipped style gives the half-up look a sharper, more polished personality. The beauty of this idea is that it feels simple but still very intentional. Start by smoothing the top layer with a brush and a touch of styling cream, then pull the side sections back evenly. Secure them with a metal clip, tortoiseshell barrette, or slim claw clip. This creates a lifted shape that frames the face while keeping the overall finish neat, clean, and easy to maintain through a busy day.
This style is especially useful when you want your hair to look finished without adding curls or heavy volume. It works well for office outfits, neutral capsule wardrobes, and simple weekend looks because the clean lines feel refined. I’ve noticed that the best results come from matching the clip finish to your outfit, such as gold for warm tones or black resin for a sharper look. A light mist of flexible hairspray keeps everything smooth without making the hair feel crunchy.
3. Pearl Pin Twist
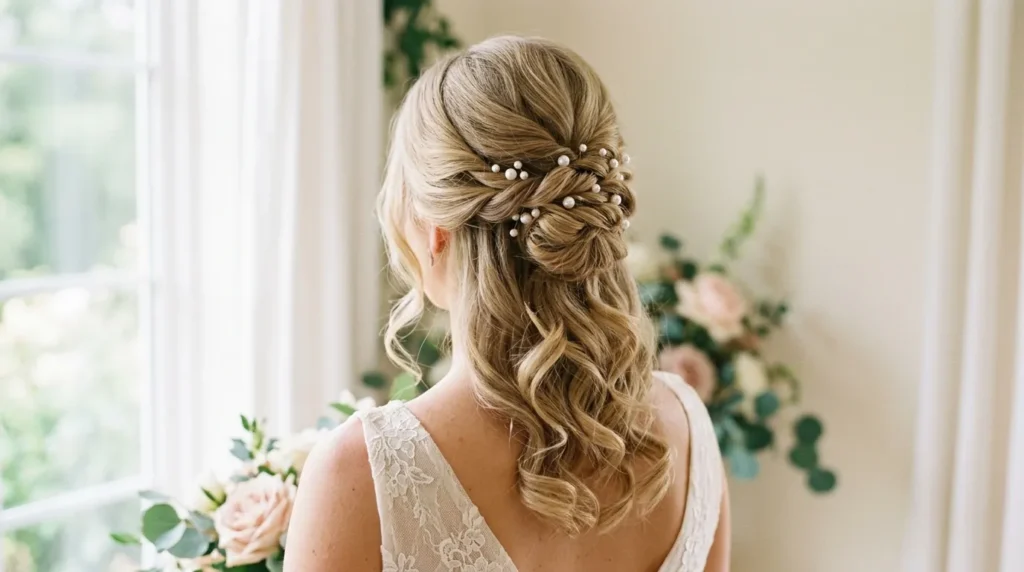
- Adds a soft bridal-inspired detail without needing a full updo
- Works well for medium and long hair lengths
- Beautiful for showers, holiday parties, and formal photos
- Uses simple pins to create a delicate, elevated finish
Pearl pins can turn a simple twist into a hairstyle that feels special, feminine, and Pinterest-ready. This idea starts with two small sections from the front or temples, twisted gently toward the back and pinned together. The pearl details can be placed along the twist, clustered near the center, or scattered lightly for a softer effect. The look works because the accessories add visual interest while the rest of the hair stays loose and touchable. It feels elegant without looking overly complicated.
The finished result is graceful and versatile, especially for events where you want something prettier than everyday hair but easier than a salon updo. Use smooth bobby pins first for structure, then add pearl pins as decoration so they do not carry all the weight. That’s why many stylists recommend separating support from styling details. For added softness, curl only the mid-lengths and ends, leaving the roots smoother so the pearl accents stay visible and the twists remain clean.
4. Braided Back Detail
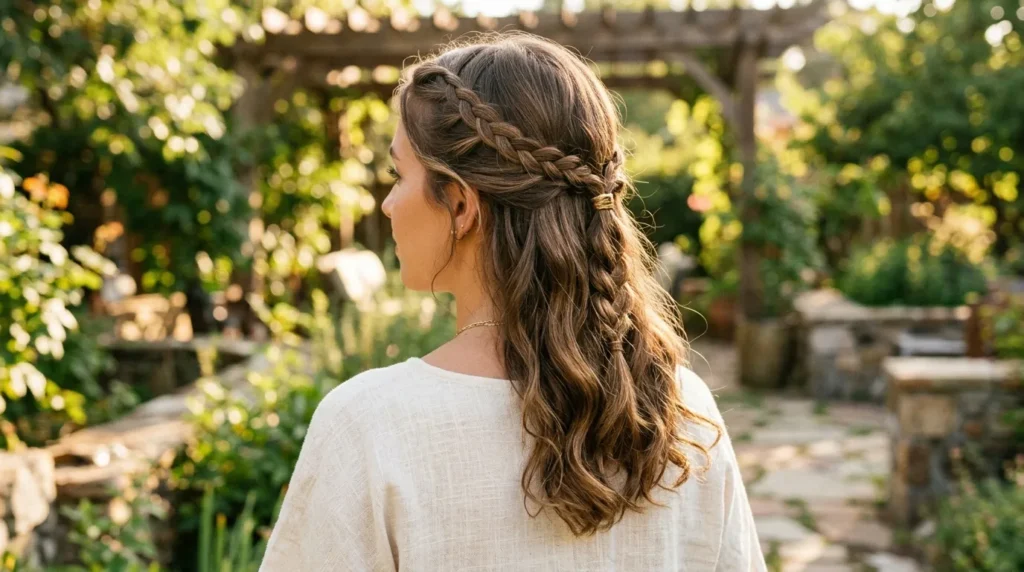
- Adds texture and interest to simple loose hair
- Helps secure side pieces without relying only on clips
- Works for casual, boho, school, and festival-inspired looks
- Can be styled with Dutch, French, rope, or regular braids
A braided back detail gives a half-up hairstyle texture, charm, and a handcrafted finish. This idea works by braiding two small side sections and joining them at the back with pins or a clear elastic. The braid does not need to be perfect; slightly loosened pieces often look more natural and flattering. For a fuller effect, gently tug at the braid edges after securing them. This creates width and softness, especially if your hair is fine or freshly washed.
The biggest upgrade is how the braid makes the style look more detailed from behind. This matters for Pinterest photos, outdoor events, and outfits with open backs or pretty necklines. Use dry shampoo or texture spray before braiding so the hair has grip and does not slip apart. For curly hair, braid larger sections to keep the texture visible. For straight hair, add loose bends first so the finished style feels blended instead of flat or overly neat.
5. Claw Clip Sweep

- Gives quick lift with very little styling effort
- Works well for second-day or third-day hair
- Adds a trendy but practical accessory moment
- Ideal for errands, casual outfits, and relaxed weekend looks
A claw clip sweep is perfect when you want easy hair that still looks styled. Instead of twisting all the hair up, gather only the top half and sweep it back into a small claw clip. This keeps the length loose while giving the crown a casual lift. The style feels relaxed, modern, and useful for everyday routines. Choose a medium clip for thick hair or a mini clip for finer textures so the hold feels secure without pulling too tightly.
This look is practical because it works with natural texture, loose waves, or lightly brushed hair. It can make second-day hair look refreshed without washing or heat styling. I’ve seen this work well for busy mornings because the clip adds shape faster than curling or pinning. For a softer finish, leave a few face-framing pieces out and gently pull the crown upward after clipping. Matte resin, marble, or neutral-toned clips photograph beautifully and pair easily with casual USA wardrobe staples.
6. Ribbon Bow Layers
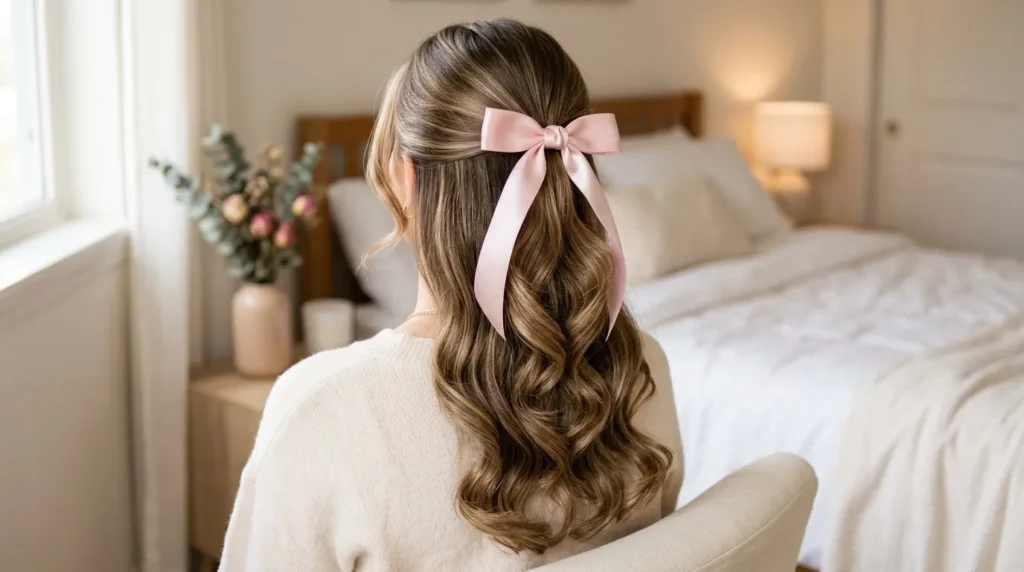
- Adds a soft feminine accent with very little effort
- Works beautifully with layered hair and curled ends
- Great for holidays, birthdays, brunch, and spring outfits
- Can be styled with satin, velvet, linen, or grosgrain ribbon
A ribbon bow brings softness and charm to a half-up hairstyle without making it feel childish. The key is choosing a ribbon that matches the mood of the outfit and tying it around a small secured section at the back. Satin feels polished, velvet feels cozy, and linen feels casual. The bow creates a focal point while the loose layers keep the look wearable. This is one of the easiest ways to make simple hair feel styled for photos.
The final look feels pretty, personal, and highly saveable for Pinterest because it adds color, texture, and movement in one detail. Curling the ends away from the face helps the ribbon sit against soft layers instead of competing with them. For shorter hair, use a smaller bow so the accessory does not overpower the shape. For long hair, longer ribbon tails can blend into the layers beautifully. Keep the knot secure with a hidden elastic underneath before adding the bow.
7. Curly Volume Pull
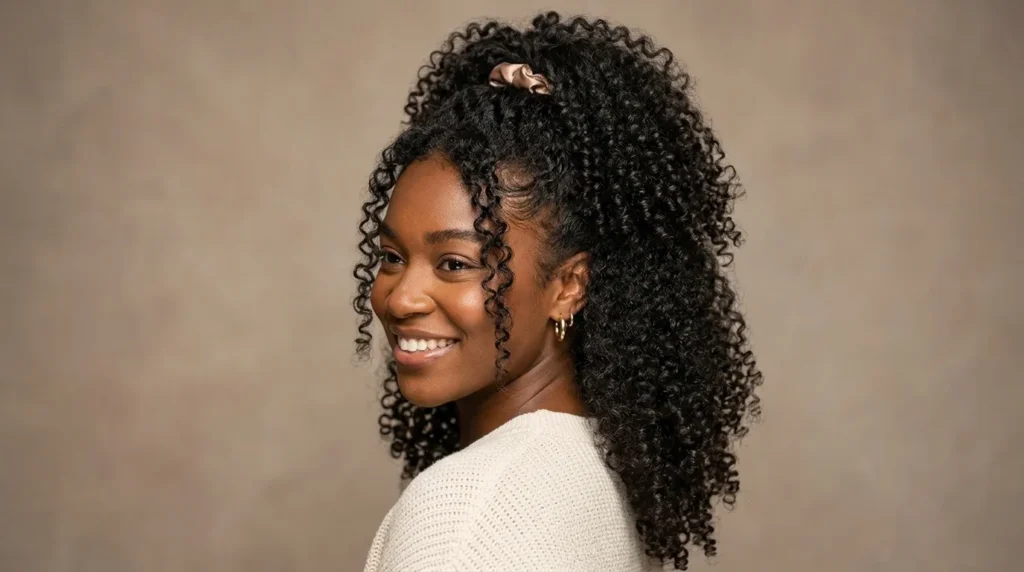
- Enhances natural curls while keeping the face open
- Adds height without flattening curl pattern
- Works for coils, waves, and voluminous curly textures
- Great for parties, portraits, and everyday curl definition
Curly hair looks stunning in a lifted half-up shape because the texture naturally adds volume and dimension. This idea works best when the top section is gathered loosely rather than pulled tight. Use your fingers instead of a brush to preserve curl definition, then secure the section with pins, a satin scrunchie, or a small claw clip. The goal is to open the face while keeping the curls full and springy. A little curl cream or refresher spray helps revive the shape.
The transformation is especially noticeable because the lifted crown creates balance while the loose curls provide drama and softness. This style can make natural texture feel celebrated instead of controlled, which is why it works so well for photos and special events. To avoid frizz, smooth only the gathered section with a small amount of gel or cream. Leave the remaining curls untouched as much as possible. For extra height, gently lift the roots with a pick before securing the top section.
8. Low Twist Knot
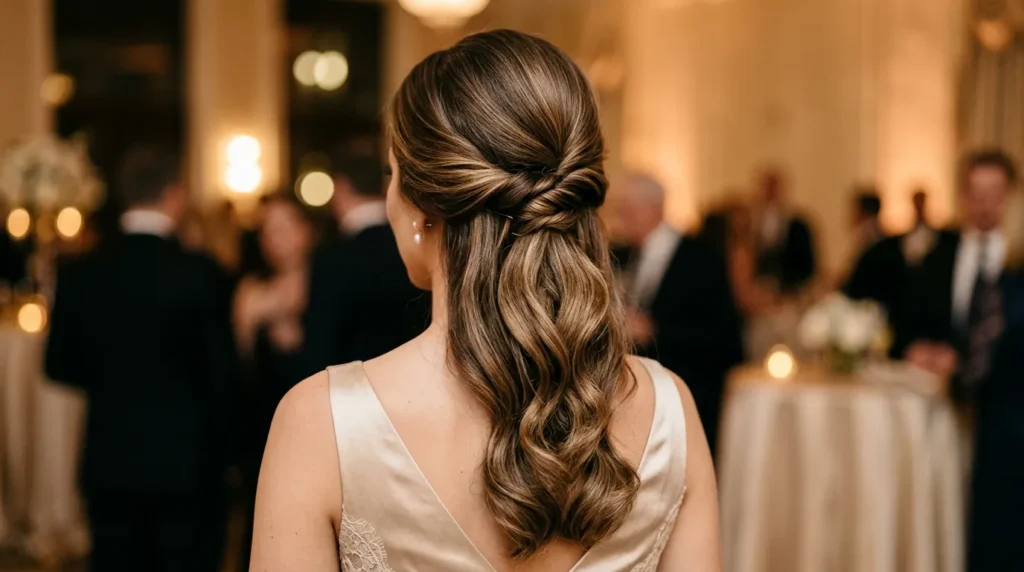
- Creates a soft, elegant back detail
- Feels more polished than a basic half ponytail
- Works well for weddings, dinner dates, and evening looks
- Can be secured with pins, clear elastics, or small decorative clips
A low twist knot gives the half-up style a graceful shape that feels understated and elegant. Start by taking two sections from each side, twisting them toward the back, and tying or pinning them into a small knot below the crown. This placement keeps the style soft rather than overly formal. The knot adds interest from the back while the loose hair keeps movement around the shoulders. It works beautifully with soft curls, brushed waves, or naturally smooth hair.
This idea is useful when you want a refined finish without committing to a full updo. The lower placement makes the style comfortable for long wear, especially during dinners, ceremonies, or outdoor events. Use a clear elastic first if your hair slips easily, then wrap a small piece of hair around it for a cleaner look. For extra hold, cross two bobby pins under the knot. The result feels secure, flattering, and quietly polished from both the front and back.
9. Minimal Barrette Hold
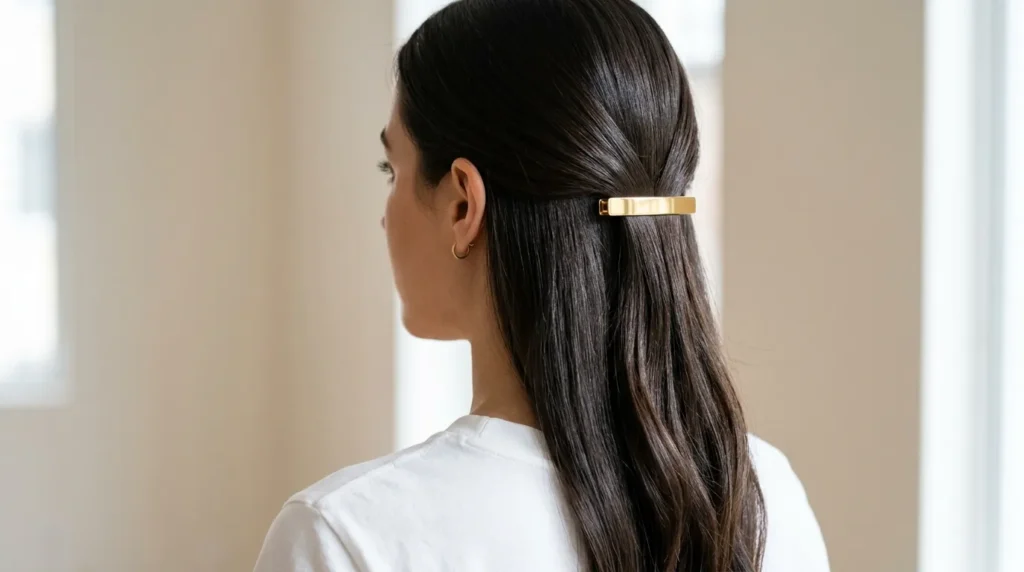
- Adds structure with one simple accessory
- Works well for straight, wavy, and lightly curled hair
- Creates a clean Pinterest-friendly side or back detail
- Ideal for minimalist wardrobes and everyday polished looks
A minimal barrette hold proves that a small detail can completely change the mood of loose hair. This look works by gathering a narrow top section or two side pieces and fastening them with a sleek barrette. The accessory should feel intentional, not oversized. Gold, silver, black, pearl, or tortoiseshell finishes all create different effects. The style is easy, but the clean placement makes it look planned. Smooth the hair first so the barrette sits flat and visible.
The result is polished enough for work but relaxed enough for everyday wear. It is especially helpful when you want to keep hair out of your face while still showing length and texture. Choose a barrette with a firm clasp if your hair is thick, or use a hidden elastic underneath if the accessory slides. I’ve noticed this style looks most expensive when the hair has a healthy shine, so a light serum through the ends can make a noticeable difference.
10. Face Frame Lift
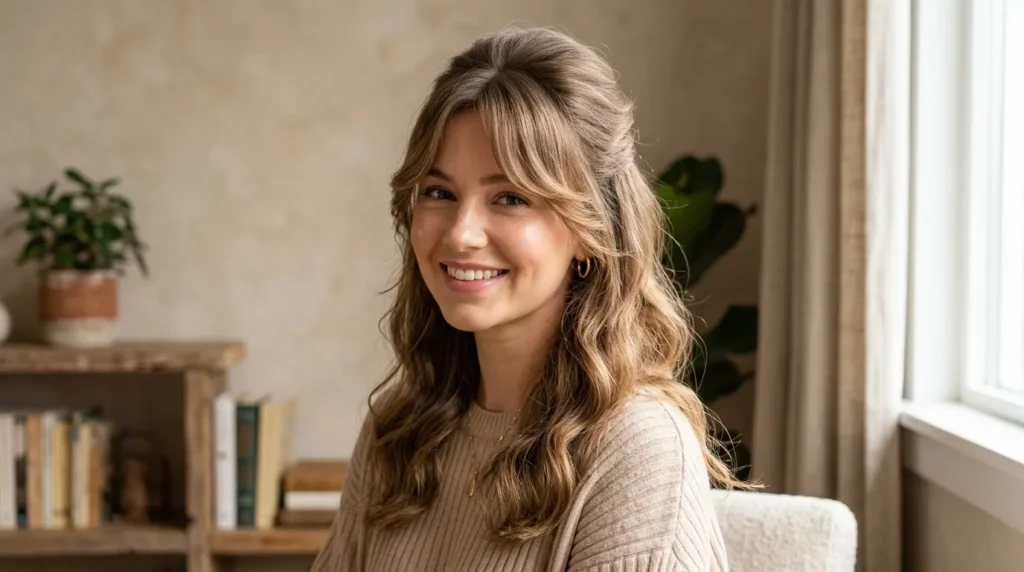
- Highlights cheekbones and softens the front hairline
- Works with curtain bangs, layers, and longer front pieces
- Creates volume without hiding the loose length
- Great for selfies, casual photos, and everyday styling
A face frame lift is flattering because it shapes the front of the hairstyle before anything else. Instead of pulling every front piece backward, leave soft strands around the face and secure the upper side sections behind them. This creates a lifted effect while keeping movement near the cheeks and jawline. The style works especially well with curtain bangs or long layers because those pieces naturally fall into shape. Use a round brush or curling wand to bend the front pieces outward.
The transformation is subtle but powerful because it makes the face look more open while keeping the hair soft. This is a practical option for anyone who wants an easy style that photographs well from the front. Use lightweight mousse or root spray near the crown if your hair falls flat quickly. For a casual finish, pinch the lifted section upward after securing it. For a dressier version, add polished waves through the ends and keep the face-framing pieces smooth.