10 Classy Bal Hairstyle Ideas
A formal ball hairstyle should feel beautiful, secure, and special without making you feel uncomfortable all night. Whether the event is prom, homecoming, a winter formal, a school ball, a military ball, or a black-tie celebration, your hair becomes part of the full look. It frames your makeup, balances your dress, shows off your earrings,…
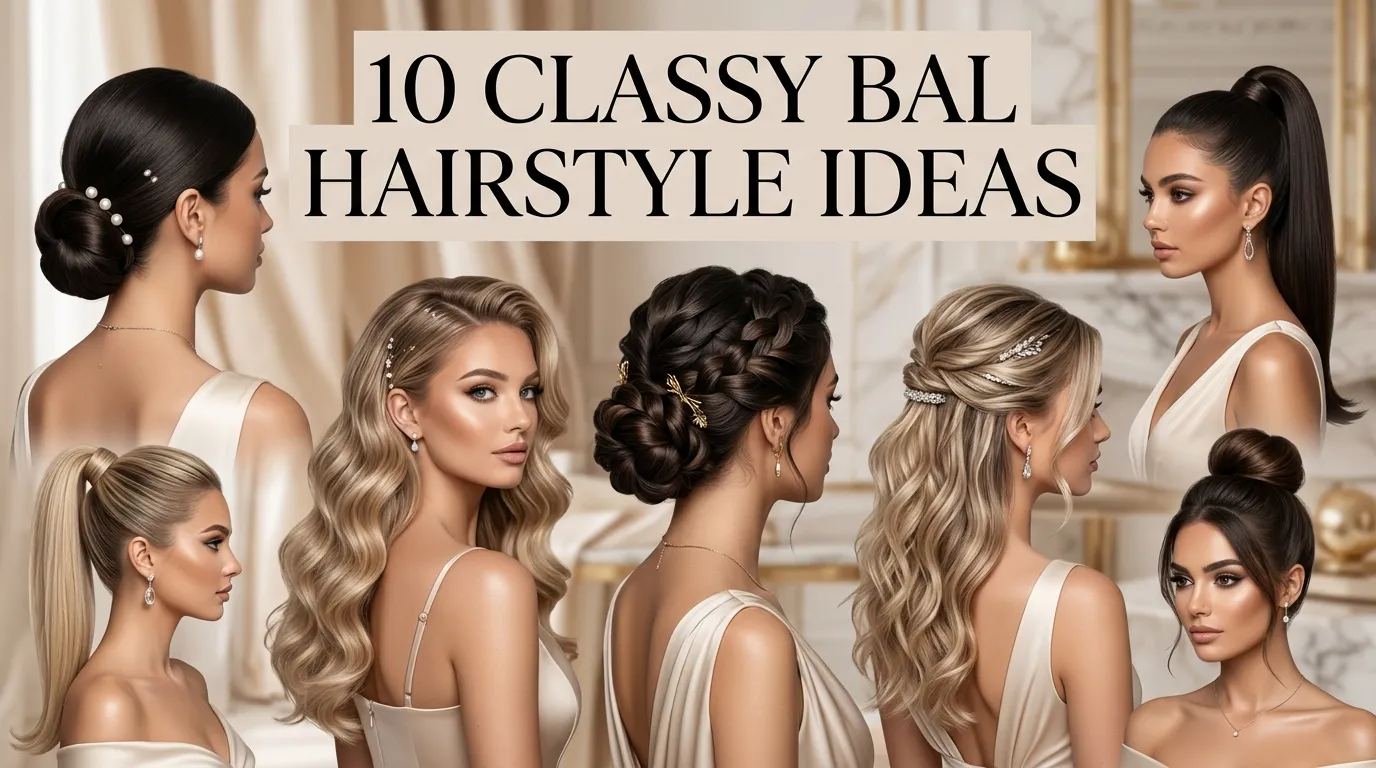
A formal ball hairstyle should feel beautiful, secure, and special without making you feel uncomfortable all night. Whether the event is prom, homecoming, a winter formal, a school ball, a military ball, or a black-tie celebration, your hair becomes part of the full look. It frames your makeup, balances your dress, shows off your earrings, and appears in every photo from the first mirror selfie to the final group shot. That is why choosing the right style matters so much.
For USA readers planning a formal event, the best hair ideas are not just pretty on Pinterest; they also need to work in real life. You want a style that survives car rides, hugs, dancing, warm venues, outdoor photos, and last-minute touch-ups. This guide focuses on elegant, wearable, and photo-friendly formal hairstyles that can be shown to a stylist or recreated in a simpler version at home. Each idea includes practical styling logic, useful materials, and visual details to help you choose confidently.
The goal is to give you polished inspiration that feels classy, not overdone. Some looks are sleek and refined, while others are soft, romantic, or full of movement. You can adapt these ideas for long hair, medium hair, curls, waves, straight textures, layered cuts, or added accessories. Think of this as a curated beauty board for anyone who wants a timeless formal hairstyle with just enough modern detail to feel fresh.
1. Low Pearl Bun
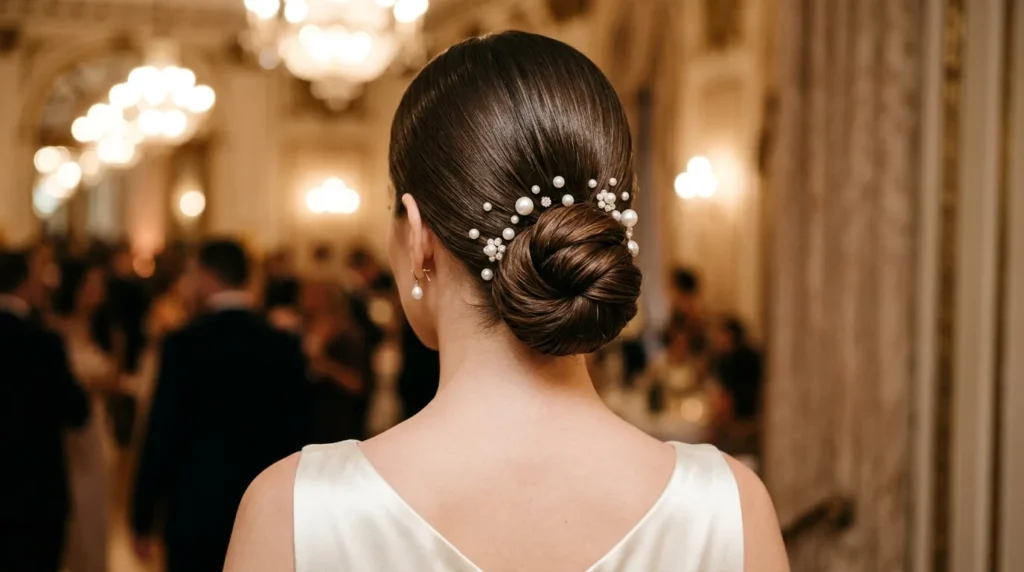
- Use pearl pins, strong bobby pins, texture spray, and smoothing cream for a secure finish.
- Works beautifully with satin gowns, lace dresses, open backs, and high necklines.
- Keeps the face, earrings, makeup, and neckline visible for formal photos.
- Best when pearl pins are placed softly on one side instead of perfectly arranged.
A low pearl bun instantly gives formal hair that calm, elegant finish people notice in photos. The style works because it keeps the shape close to the nape, where the bun feels graceful instead of stiff. Start with smooth, lightly textured hair, gather it low, and twist it into a rounded bun using strong pins. Add pearl pins around one side rather than placing them in a perfect circle. That softer placement makes the accessory look intentional, delicate, and more expensive under warm venue lighting, especially beside satin, lace, or beaded fabrics.
The transformation is practical because the hair stays secure while the face, neckline, earrings, and dress details remain visible. This is a smart option for satin gowns, high-neck dresses, open backs, and statement jewelry. Use smoothing cream near the crown, texture spray through the lengths, and firm hairspray only after the bun is shaped. In my experience, this look photographs best when two tiny face-framing pieces are left loose, especially if the makeup is soft, glowy, or romantic for a spring formal night with friends and family photos afterward too.
2. Soft Side Waves
- Curl hair in one direction, then brush gently for smooth, flowing movement.
- Pin one side behind the ear to show earrings, makeup, and dress straps.
- Works well with sweetheart, one-shoulder, strapless, and fitted gowns.
- Use shine spray lightly through the ends for a polished formal finish.
Soft side waves create the kind of graceful movement that makes a formal look feel polished from the first photo. The style works by building smooth volume at the roots, curling hair in one direction, then sweeping the length over one shoulder. This creates asymmetry, which naturally makes the hairstyle look more designed. Use a curling iron, shine spray, strong bobby pins, and flexible hairspray. Keep the hidden side pinned neatly behind the ear so earrings, makeup, and dress straps stay beautifully visible in every indoor and outdoor picture angle.
The result feels glamorous without being difficult to wear, which matters when the night includes dinner, dancing, and group photos. This look is especially flattering with sweetheart necklines, one-shoulder gowns, and simple fitted dresses because the hair adds softness. Let the curls cool completely before brushing them into waves, or they may drop too quickly. If your hair is fine, add volumizing mousse before blow-drying. If it is thick, pin in small sections so the swept shape stays comfortable, controlled, and photo ready for hours without constant mirror checks later.
3. Sleek Center Part

- Creates a clean, modern, polished look with very little visual clutter.
- Best with smoothing cream, flat iron work, shine serum, and a wax stick.
- Pairs well with dramatic gowns, bold makeup, and statement earrings.
- Can be worn loose, tucked, in a low bun, or in a sleek ponytail.
A sleek center part gives formal hair a clean, confident edge that feels modern without looking harsh. This idea works because the symmetry frames the face evenly and makes the entire outfit look intentional. Start by blow-drying hair smooth with a paddle brush, then use a flat iron in small sections for a glassy finish. A light serum through the ends adds shine, while a wax stick or styling cream controls flyaways near the part. Keep the placement exact for the most polished result. That precision makes the entire look feel deliberate, clean, and mature.
The finished look is especially useful when the dress has bold color, sparkle, feathers, or dramatic structure, because the hair does not compete. It simply sharpens everything around it. This style can be worn down, tucked behind the ears, or pulled into a low bun or ponytail. I’ve noticed it works best with healthy-looking shine, so trim dry ends before the event if possible. Use a humidity-resistant spray if the venue is warm or the photos are outside in spring weather. It also helps bold makeup feel sharper without adding visual clutter.
4. Twisted Half Up
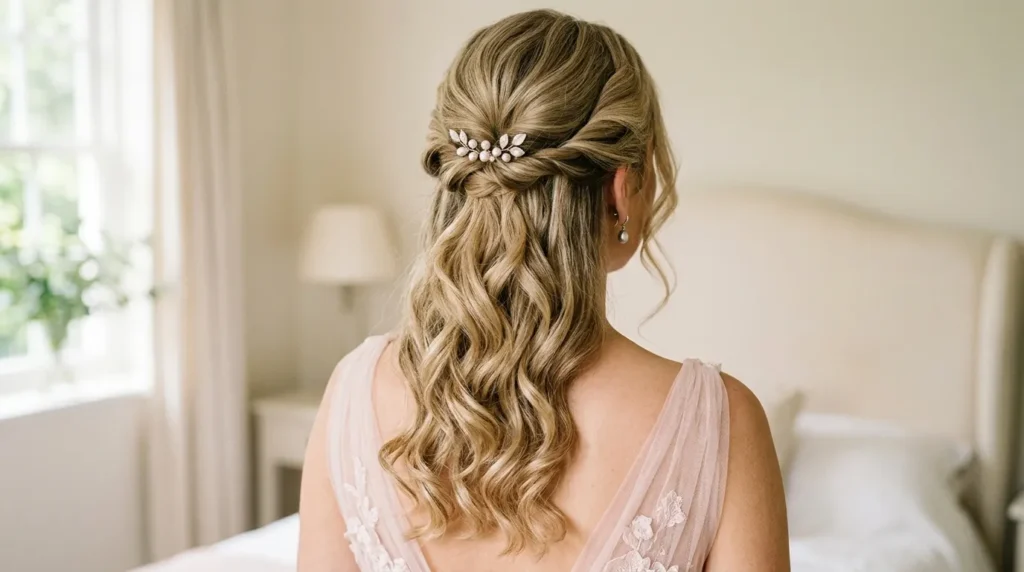
- Keeps hair away from the face while still showing length and movement.
- Works with curls, soft waves, medium hair, long hair, and layered cuts.
- Can be finished with pearl pins, crystal clips, ribbon, or a small barrette.
- Ideal for anyone who wants a romantic look without a full updo.
A twisted half-up style is perfect when you want softness around the shoulders but still need control at the front. The style works by taking two side sections, twisting them backward, and securing them near the crown or slightly lower. This opens the face while keeping the length visible, which is ideal for photos. Use a clear elastic, bobby pins, curling iron, and light texture spray. Gently loosen the twists after pinning so they look fuller and more romantic instead of tight. This makes the back detail visible without hiding the dress shape.
The transformation feels pretty and wearable because it combines the best parts of loose curls and pinned formal hair. It is a strong choice for medium or long hair, especially with layered cuts that need a little structure. Curl the loose ends away from the face, then brush lightly for softness. If you want extra detail, add tiny pearl pins, crystal clips, or a thin ribbon at the joining point. This gives the style a finished look without making it feel overly complicated. It also gives you flexibility if you want a veil-like hair effect.
5. Braided Chignon
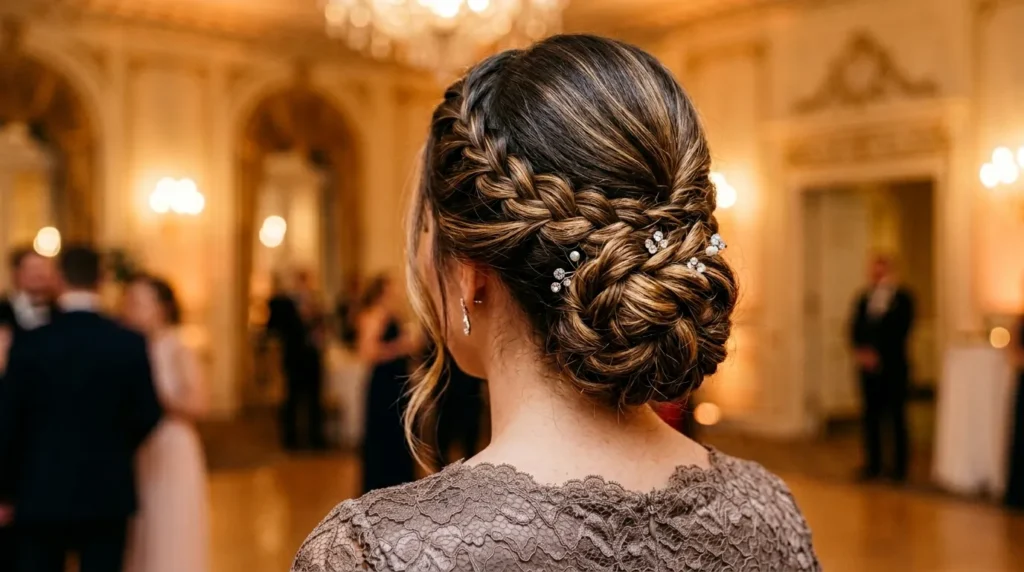
- Adds texture and secure hold to a classic low bun shape.
- Works well for lace gowns, romantic dresses, and open-back formal looks.
- Use dry texture spray before braiding so the hair grips better.
- Pancake the braid gently to make it look fuller, softer, and more expensive.
A braided chignon brings texture, security, and elegance together in one formal hairstyle. This look works by adding a braid along one side or through the bun itself, giving the low updo more dimension. The braid can be neat and smooth or gently loosened for a softer finish. Use dry texture spray before braiding so the strands hold, then pin the braid into or around the bun. The added detail makes the style look custom, even when the shape stays simple and classic. It feels especially elevated when the braid sits slightly off-center.
The result is dependable for long events because the braid helps anchor the style while adding visual interest from the back. This is useful for ball gowns, lace dresses, and open-back designs where guests will see the hairstyle from multiple angles. If your hair is fine, gently pancake the braid to make it look wider. If your hair is thick, ask for smaller pinned sections to avoid heaviness at the nape. That’s why many stylists recommend braided structure for formal updos that need lasting hold. This keeps the neckline comfortable and the finished shape balanced.
6. Crystal Clip Curls
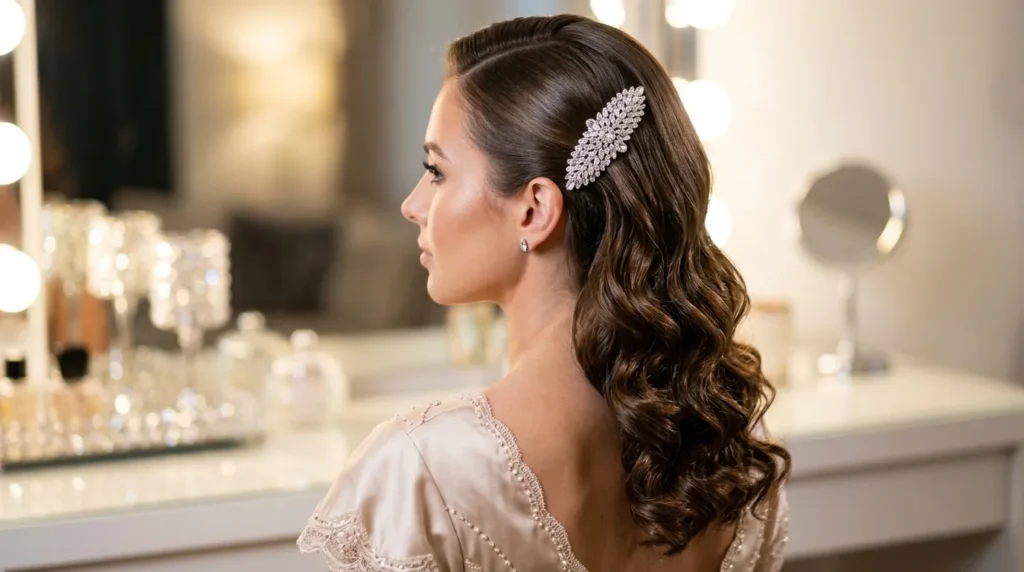
- Adds sparkle without needing a full updo or heavy accessories.
- Works best with side parts, soft curls, long layers, and simple gowns.
- Use crossed bobby pins under the clip if your hair slips easily.
- Choose silver, gold, or clear crystals based on your jewelry and dress tone.
Crystal clip curls add sparkle in a way that feels polished, not childish, when the placement is clean. The style starts with loose curls or soft waves, then one side is pinned with a crystal barrette, comb, or cluster clip. The accessory catches light during photos and dancing, giving the hair a formal finish without needing a full updo. Use flexible hairspray, a curling iron, shine spray, and crossed bobby pins under the clip if extra support is needed. Place the clip where it can be seen clearly from the camera.
The visual upgrade comes from contrast: soft movement on one side and bright detail on the other. This makes the style flattering for side parts, long layers, and dresses with simple necklines. Choose silver crystals for cool-toned dresses, gold crystals for warm shades, and clear stones when you want the accessory to work with everything. Keep other jewelry balanced so the clip remains a highlight instead of fighting for attention. The look stays easy to wear while still feeling special enough for formal pictures. It is simple enough to adjust quickly before leaving home.
7. Voluminous Ponytail
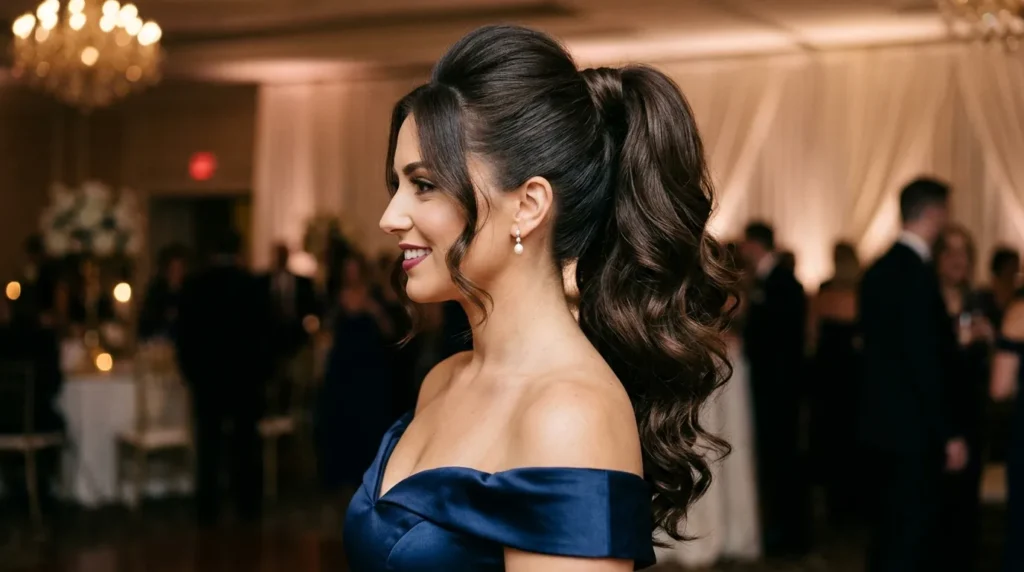
- Gives height, movement, and comfort while still looking formal.
- Best with mousse, texture spray, a strong elastic, bobby pins, and curls.
- Wrap hair around the elastic to make the ponytail look finished.
- Works with strapless dresses, halter necklines, fitted gowns, and bold earrings.
A voluminous ponytail gives formal hair lift, movement, and a confident shape without feeling too traditional. This style works by creating height at the crown, smoothing the sides, and curling the ponytail for fullness. A wrapped strand around the elastic makes it look instantly more polished. Use mousse before blow-drying, texture spray at the roots, a strong elastic, bobby pins, and a curling iron. The ponytail can sit high for drama or mid-height for a softer, balanced finish. Leave soft front pieces if you want a more romantic finish overall.
The transformation is practical because the hair stays controlled while still moving beautifully when you walk or dance. It works well with fitted gowns, halter necklines, strapless dresses, and bold earrings. For fine hair, tease inside the ponytail and smooth the outer layer so the volume looks natural. For thick hair, use two elastics or a ponytail hook for stronger support. I’ve seen this look hold up well during long formal nights because it keeps glamour and comfort working together. It also keeps hair away from lip gloss and humid skin.
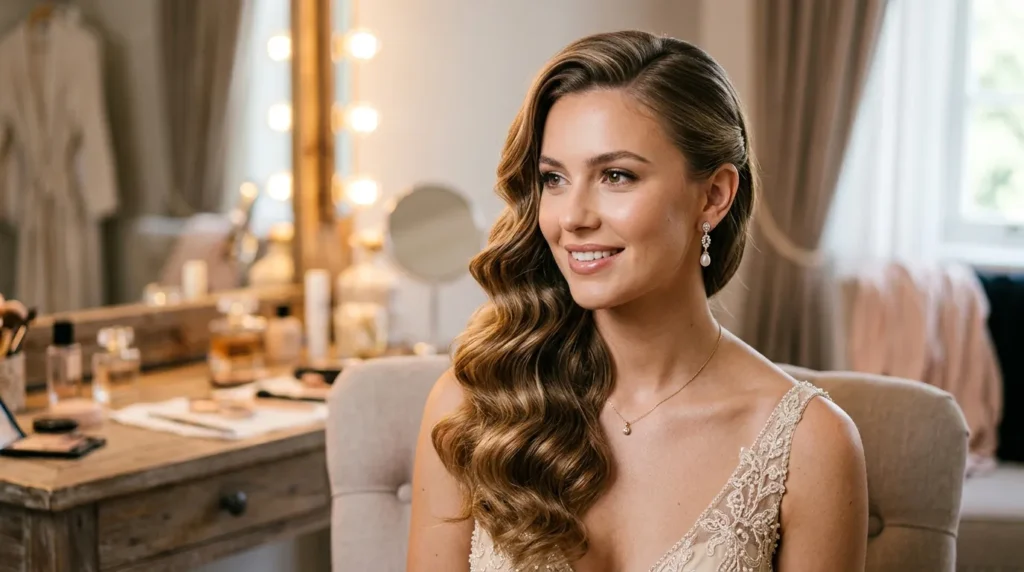
8. Hollywood Curls

- Creates a glossy, classic wave pattern that looks beautiful in flash photos.
- Best with a deep side part, smoothing cream, curl clips, and shine spray.
- Works beautifully with satin dresses, vintage jewelry, and bold lipstick.
- Brush curls only after they cool so the wave pattern stays defined.
Hollywood curls create a glossy, old-school formal finish that looks beautiful under flash photography. The style works because every curl is shaped in the same direction, then brushed into smooth waves instead of left separated. Start with a deep part, curl each section evenly, and clip the waves while they cool. Use smoothing cream, a curling iron, flat clips, shine spray, and flexible hairspray. The polished pattern gives the hair structure, while the brushed finish keeps it soft and touchable. This creates that smooth wave line people associate with classic glamour.
The final effect feels glamorous and timeless, especially with satin dresses, red lips, winged liner, or vintage-inspired jewelry. This style is best when the roots stay smooth and the waves fall in a clean shape around the face. Avoid heavy texture products, because they can make the finish look beachy instead of formal. If your hair struggles to hold curl, prep with mousse and pin each curl until fully cool. The extra step makes a major difference during a full evening event. It is worth practicing once before the big night arrives.
9. Ribbon Low Bun
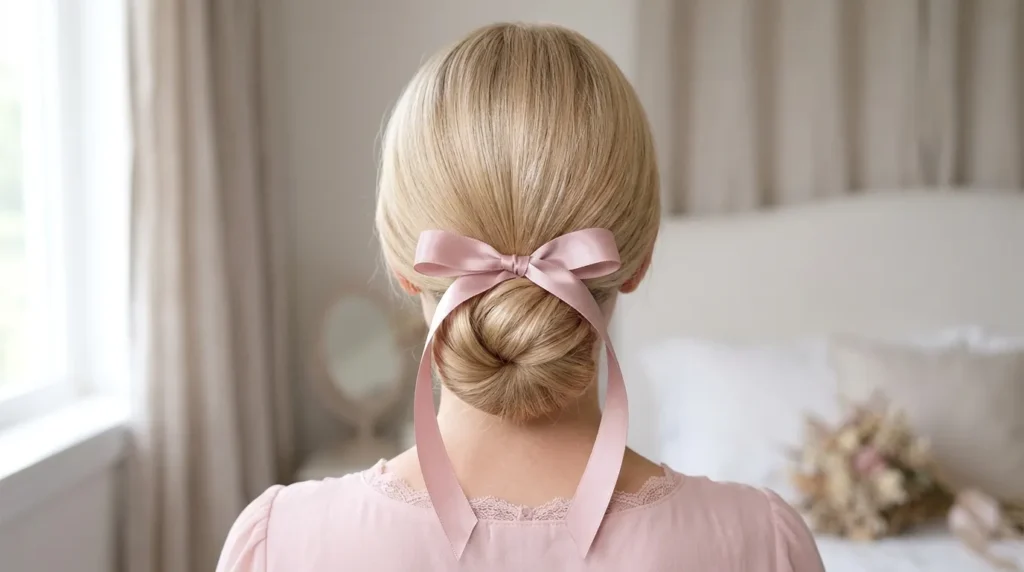
- Adds soft feminine detail without making the style feel too busy.
- Works with satin, velvet, organza, or grosgrain ribbon.
- Best for romantic gowns, pastel dresses, black gowns, and soft makeup.
- Secure the bun first, then add the ribbon as decoration only.
A ribbon low bun feels soft, feminine, and refined when the bow is chosen with the outfit in mind. The bun sits near the nape, while a satin, velvet, or organza ribbon wraps around the base or ties beneath the twist. This adds texture and color without relying on heavy jewelry. Use a clear elastic, pins, smoothing cream, and ribbon with enough length to create balanced tails. Keep the bow slightly relaxed so it feels elegant rather than overly perfect. The ribbon should complement the dress, not overpower the hairstyle.
The transformation comes from the ribbon making a simple bun feel personal and photo-ready. This idea is lovely for pastel dresses, black gowns, floral details, and romantic makeup. Match satin ribbon with satin dresses for a coordinated look, or use velvet for cooler months and richer fabrics. For better hold, secure the bun completely before tying the ribbon, so the accessory is decorative rather than functional. This keeps the hairstyle comfortable, especially if the event lasts several hours and includes lots of movement. It also gives simple dresses a charming detail in photos.
10. Curly Pin Back
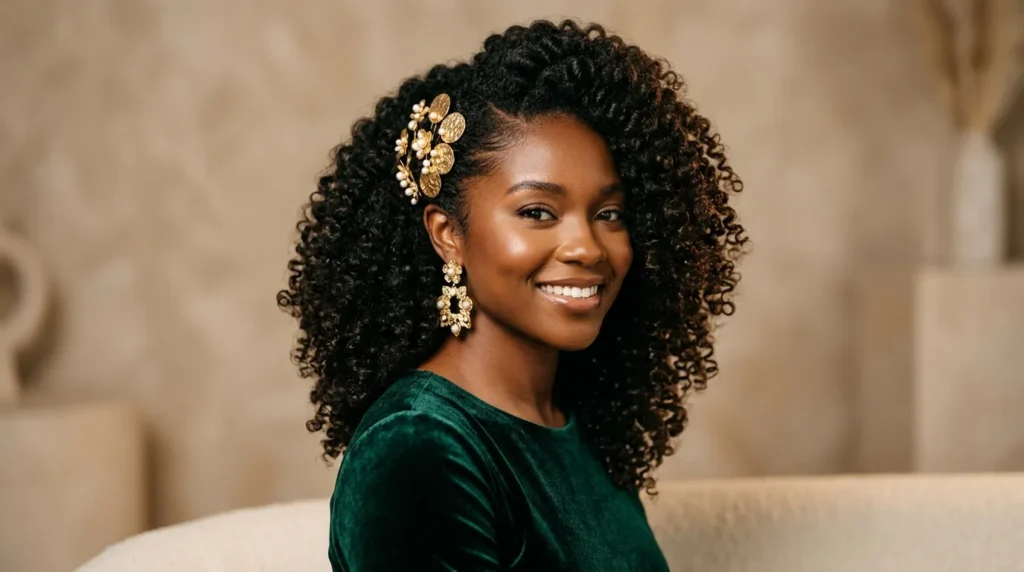
- Celebrates natural texture while keeping the front controlled and photo-ready.
- Works for curls, coils, waves, and full textured hair.
- Use curl cream, gel, a diffuser, edge brush, and small pins.
- Add pearl, gold, or crystal pins depending on your outfit and jewelry.
A curly pin-back style lets natural texture stay visible while keeping the front pieces controlled. This idea works by defining the curls first, then pinning one or both sides away from the face with decorative pins or hidden bobby pins. The shape stays soft, but the face opens for makeup, earrings, and photos. Use curl cream, gel, a diffuser, edge brush, and small pins that match your hair color. Avoid brushing after styling so the curl pattern remains defined. The goal is control at the front, not flattened volume overall.
The result feels natural, polished, and comfortable because the curls are not forced into a shape that fights their movement. This works for coils, waves, and full curls, especially when the dress has shoulder details or a pretty neckline. Add pearl pins for softness, gold pins for warmth, or crystal pins for sparkle. Refresh curls with a light mist before leaving, then touch only the pinned sections if needed. This keeps the style looking intentional without flattening the texture or causing frizz. It is a beautiful choice when comfort matters as much as style.