
10 Pumpkin Carving Ideas
Pumpkin carving is one of those fall traditions that can turn an ordinary October evening into a memory you actually want to repeat next year. There is something wonderfully satisfying about choosing the perfect pumpkin, sketching out a design, scooping out the messy center, and finally seeing a candle or light shine through your finished…
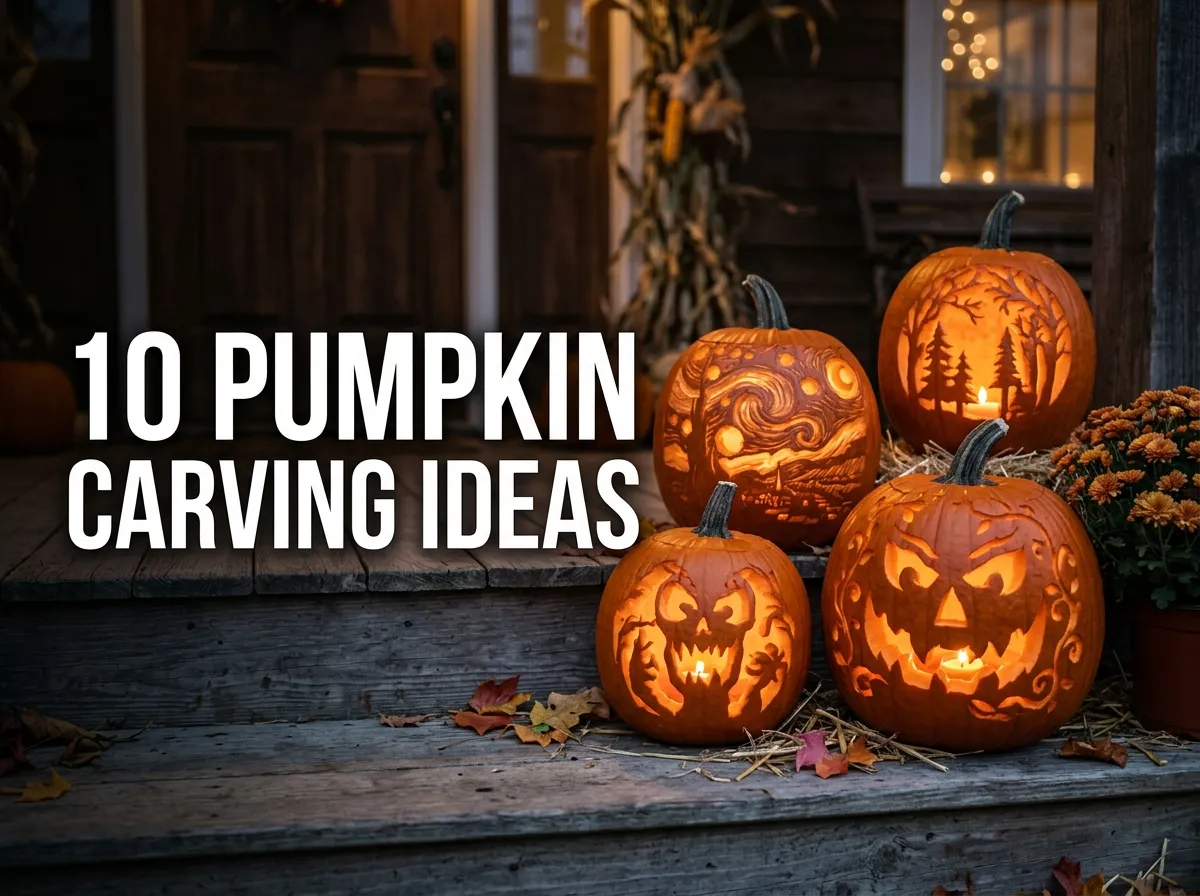
Pumpkin carving is one of those fall traditions that can turn an ordinary October evening into a memory you actually want to repeat next year. There is something wonderfully satisfying about choosing the perfect pumpkin, sketching out a design, scooping out the messy center, and finally seeing a candle or light shine through your finished creation.
The tricky part is deciding what to carve.
A classic triangle-eyed jack-o’-lantern is always fun, but sometimes you want something a little more creative. Maybe you are decorating a front porch and want a collection that looks polished. Maybe you are carving pumpkins with kids and need designs that are simple enough for little hands. Or perhaps you are looking for a more sophisticated Halloween look that feels spooky without taking over your entire home.
That is where thoughtful design makes a difference.
The best pumpkin designs are not necessarily the most complicated. Often, bold silhouettes, clean shapes, carefully placed cutouts, and creative lighting produce the biggest visual impact. You can even create impressive results without being an expert with a carving knife.
In my experience, the easiest way to make a pumpkin look special is to choose a design that matches the size and shape of the pumpkin instead of trying to force a detailed pattern onto it. Tall pumpkins are wonderful for expressive faces, round pumpkins can become moons or smiling characters, and small pumpkins are perfect for stars, hearts, letters, or simple geometric shapes.
The ideas below include classic Halloween looks, playful designs for families, elegant patterns for grown-up spaces, and clever options for porches and party displays. You will also find practical carving guidance so your pumpkins are easier to work with and safer to display.
Whether you are hosting a neighborhood Halloween party, decorating your front steps, or planning a cozy carving night with your family, these ideas can help you create jack-o’-lanterns that feel creative, festive, and completely worth photographing.
Table of Contents
1. Classic Friendly Faces
A timeless jack-o’-lantern look that is easy to carve and perfect for family decorating.
2. Haunted Silhouette Shapes
Use bold cutouts to create mysterious pumpkins with dramatic nighttime shadows.
3. Starry Night Designs
Turn your pumpkin into a glowing night sky filled with stars and a crescent moon.
4. Cat Face Carvings
Create playful Halloween pumpkins inspired by one of the season’s favorite spooky animals.
5. Monogram Pumpkin Style
Personalize your porch with carved initials, names, or simple lettering.
6. Spiderweb Pumpkin Pattern
Give your display a creepy-crawly twist with web-inspired lines and a central spider.
7. Toothless Grin Pumpkins
Make oversized smiles the star of your Halloween display with exaggerated designs.
8. Leaf And Vine Carving
Choose an elegant nature-inspired pattern for a softer autumn Halloween look.
9. Ghostly Pumpkin Faces
Create glowing ghost designs that are playful, spooky, and especially fun for kids.
10. Geometric Cutout Style
Use simple circles, triangles, diamonds, and repeating patterns for a modern pumpkin display.
1. Classic Friendly Faces
Quick Benefits
- Easy for beginners
- Great for families with children
- Instantly recognizable as Halloween decor
- Works with pumpkins of almost any size
- Easy to customize with different expressions
Why It Works
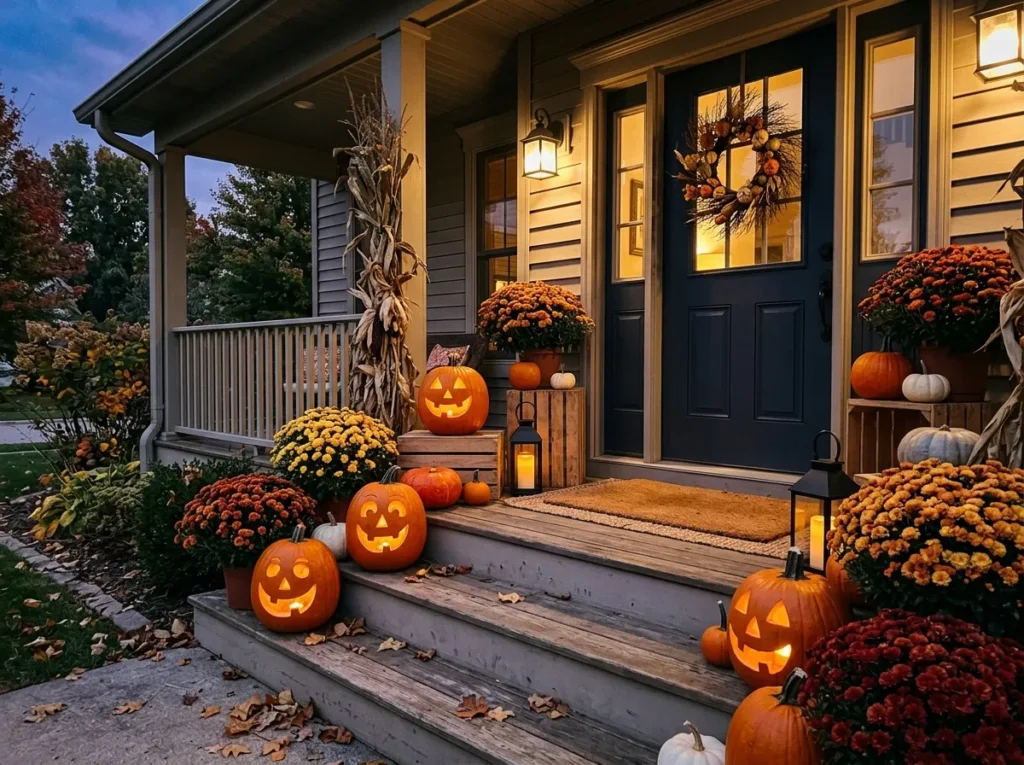
There is a reason the classic jack-o’-lantern remains a favorite year after year. A few simple shapes can completely change the personality of a pumpkin, and friendly faces are especially forgiving when you are learning how to carve.
Instead of trying to make every line perfectly symmetrical, concentrate on expression. Large eyes, a slightly crooked smile, raised eyebrows, or a few intentionally uneven teeth can actually make the pumpkin more charming.
This is also a design that photographs beautifully at night. Once a warm light is placed inside, the carved openings become the focus, making even a very simple pattern look cheerful and festive.
For family carving nights, classic faces are particularly useful because everyone can create their own interpretation.
How To Style It
Choose pumpkins with relatively smooth surfaces and stable flat bottoms. Before carving, wipe them clean and use a washable marker to draw the face.
Keep the eyes large enough to cut comfortably. Very tiny shapes and narrow corners can be frustrating for beginners.
For the mouth, try a broad smile with a few triangular teeth. Varying the tooth sizes creates a playful expression.
Display several pumpkins together, but avoid making every face identical. One can smile, another can look surprised, and another can have a slightly mischievous grin.
On a porch, place the pumpkins on different levels using a wooden crate, low planter, or sturdy step. Indoors, group them on a console table with autumn leaves, battery-operated lights, and a small Halloween sign.
Extra Carving Tips
Think about the light source before cutting extremely large openings. A small battery-powered LED light can create a softer effect than a bright internal lamp.
For younger children, adults should handle sharp carving tools while kids can help choose expressions, draw patterns, and scoop pumpkin seeds with appropriate supervision.
2. Haunted Silhouette Shapes
Quick Benefits
- Creates a dramatic Halloween mood
- Looks impressive after dark
- Can be adapted to different themes
- Works well on porches and patios
- Uses bold shapes instead of intricate details
Why It Works
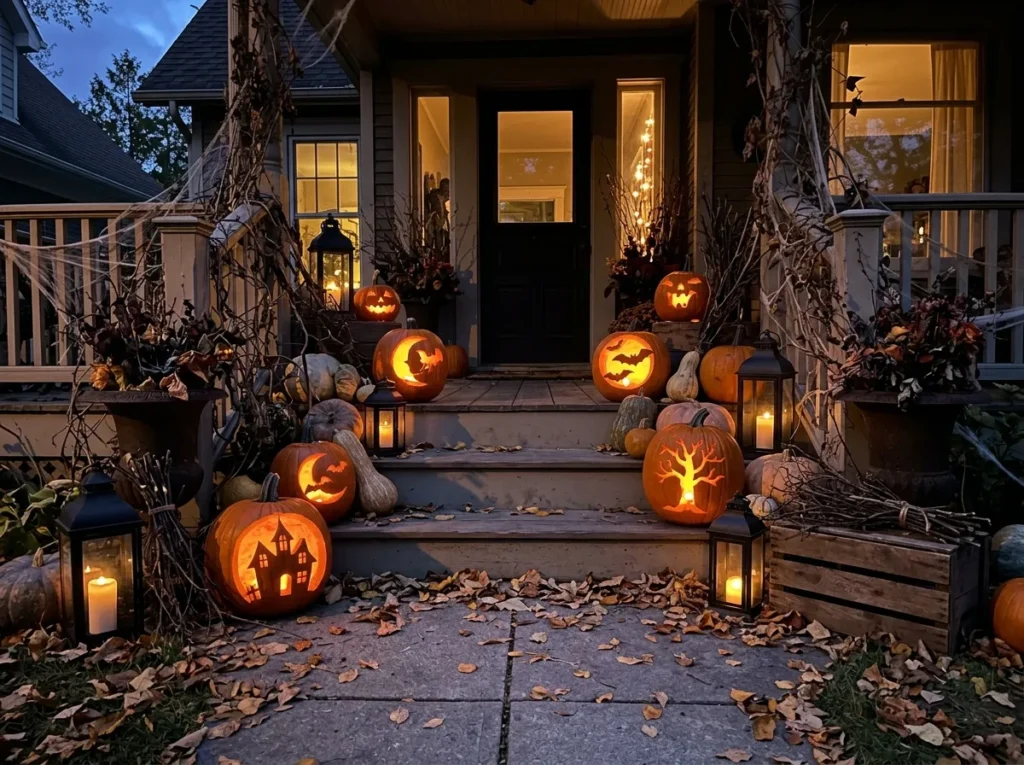
Silhouettes are powerful because they let the viewer’s imagination fill in the missing details. A haunted house, crooked tree, witch’s hat, flying bat, or spooky cemetery scene can become surprisingly dramatic when carved into a pumpkin and illuminated from behind.
The most important part is keeping the design bold. Tiny details may disappear once the pumpkin is glowing outdoors at night. Large silhouettes with a few recognizable shapes usually create a stronger visual effect.
This style is particularly attractive for adults who want something more atmospheric than a traditional smiling jack-o’-lantern. Instead of focusing on a face, the pumpkin becomes a little Halloween scene.
How To Style It
Start with a larger pumpkin that gives you enough surface area for your design. Choose a simple silhouette such as a haunted house with two windows and a moon, a flock of bats, or a crooked tree with branches.
Transfer the design onto the pumpkin using a printed template, stencil, or your own sketch. Cut the main outlines carefully and leave enough pumpkin between sections so the structure remains strong.
Place the pumpkin in a dark corner of the porch where the glow can be noticed. A black metal lantern, dried corn stalks, or dark foliage can complement the design.
For a more dramatic effect, display three pumpkins with related scenes rather than three unrelated patterns. A moon, haunted house, and tree can look like one continuous story.
Extra Carving Tips
Test your design on paper before cutting. If the shape is difficult to recognize in a simple black silhouette, simplify it further.
The best nighttime patterns usually rely on strong contrast rather than lots of tiny detail.
3. Starry Night Designs
Quick Benefits
- Beautiful alternative to traditional faces
- Works for elegant autumn decorating
- Easy to create with simple shapes
- Looks magical with warm lighting
- Suitable for adults and families
Why It Works
A pumpkin covered in stars feels both seasonal and slightly unexpected. Instead of creating a spooky character, you are using the pumpkin itself as a glowing lantern.
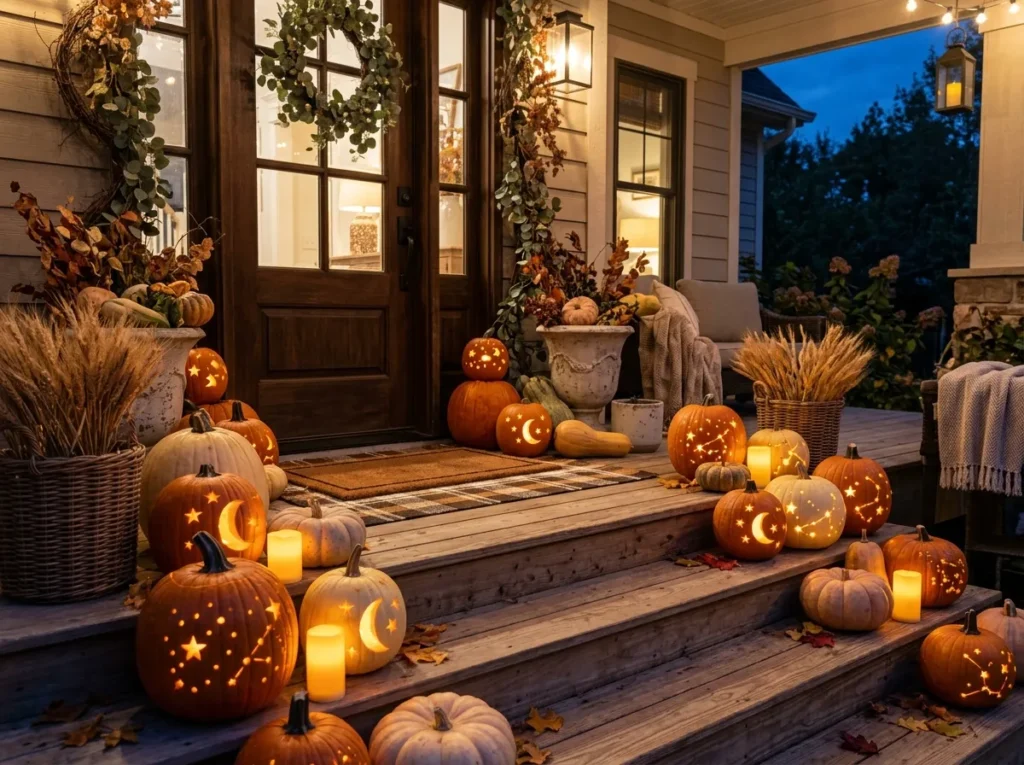
This design is especially effective because stars naturally create scattered points of light. When a light source shines from inside, the entire pumpkin can resemble a tiny night sky.
You can make the pattern as simple or elaborate as you like. A few large stars can create a minimalist appearance, while many small cutouts can produce a more luminous effect.
The addition of a crescent moon makes the design instantly recognizable and gives the pumpkin a more finished composition.
How To Style It
Use a tall or round pumpkin with a relatively even exterior. Sketch a crescent moon on one side and scatter stars across the remaining surface.
Avoid placing too many cutouts close together because the walls of the pumpkin need enough strength to remain intact.
For an elegant porch, use cream or pale orange pumpkins with simple star designs and warm lights. For a classic Halloween arrangement, use bright orange pumpkins and pair them with black lanterns.
Indoors, star-carved pumpkins can sit beside candles, dried branches, or a stack of autumn books.
You can also experiment with stars in different sizes. Larger stars create brighter points of light, while small stars create a more delicate glow.
Extra Carving Tips
A small metal or paper punch-style tool can help create consistent round holes if your chosen design includes dots or tiny stars.
Always place your internal light so that it sits securely and does not create a fire hazard.
4. Cat Face Carvings
Quick Benefits
- Perfect for cat lovers
- Playful Halloween personality
- Easy to personalize
- Great for family carving
- Pairs well with traditional Halloween decor
Why It Works
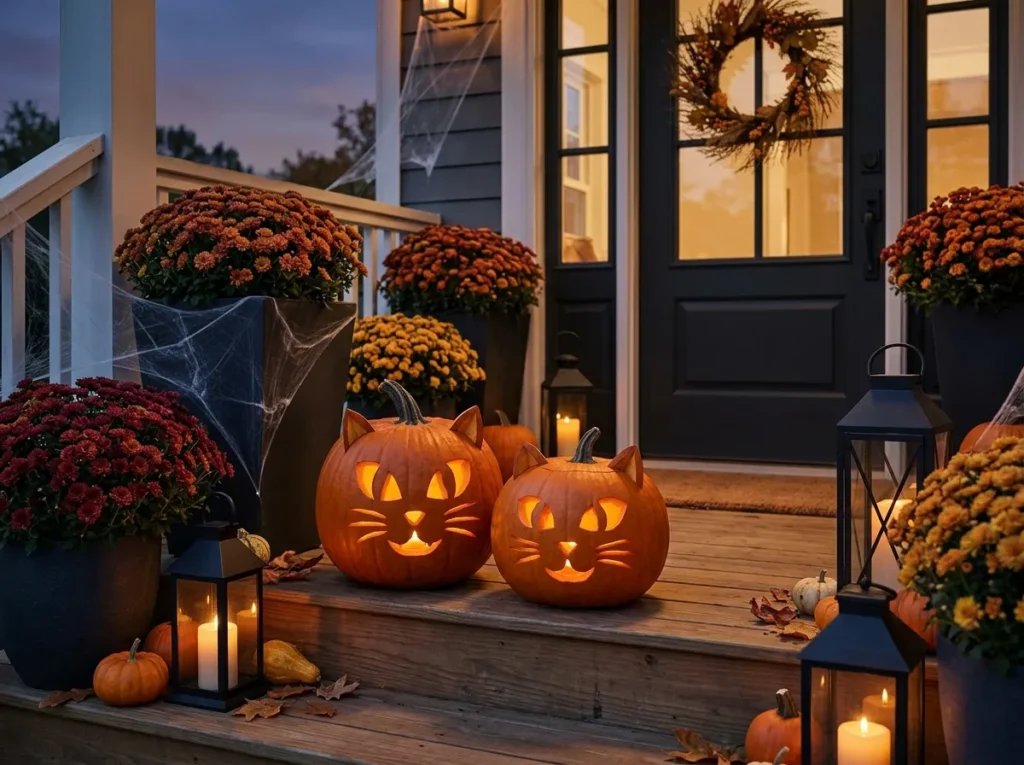
Cats and Halloween go together naturally, which makes a cat-inspired pumpkin an easy way to create something recognizable without using a standard jack-o’-lantern face.
The beauty of this design is that the ears do some of the visual work. Even if the face itself is simple, pointed ears immediately suggest a cat.
You can make the expression sweet, curious, mysterious, or mischievous. Large eyes create a cute appearance, while narrow eyes and sharp teeth make the pumpkin feel more spooky.
This is also one of those designs that looks especially good as a pair.
How To Style It
Choose two pumpkins in slightly different sizes and carve matching but not identical cat faces. One can have larger eyes while the other has a mischievous grin.
For the ears, draw triangular shapes near the upper portion of the pumpkin. Keep them large enough to read clearly once illuminated.
Add small whisker lines on either side of the face if the pumpkin wall is thick enough to support them.
On a porch, pair the pumpkins with black planters, dark foliage, faux spiderwebs, or a simple Halloween welcome mat.
For indoor decorating, place one cat pumpkin on a console with framed artwork and another on a nearby shelf to create visual repetition.
Extra Carving Tips
Avoid placing the ears too close to the top opening. Leave enough solid pumpkin around them so the top remains sturdy.
A slightly elongated pumpkin often works beautifully for a cat-inspired face because the proportions naturally resemble a character.
5. Monogram Pumpkin Style
Quick Benefits
- Personalizes your Halloween decor
- Great for family displays
- Creates an elegant porch accent
- Easy to combine with other pumpkins
- Works with names and initials
Why It Works
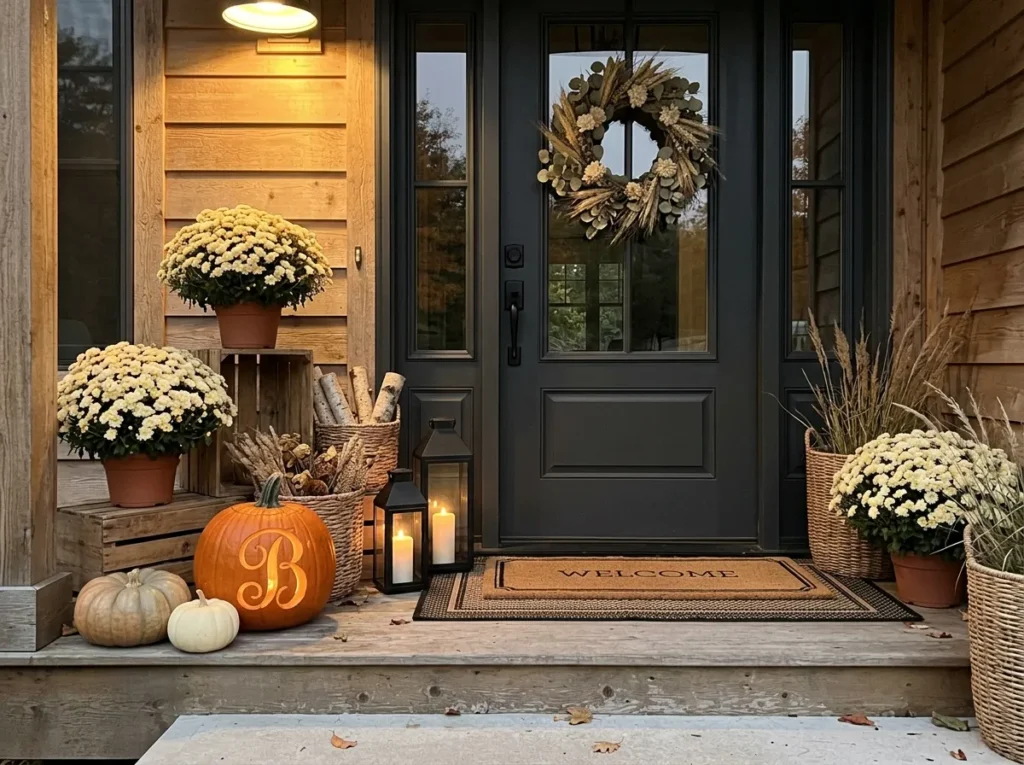
Personalization immediately makes seasonal decorating feel more intentional. A carved initial or short name transforms a regular pumpkin into something unique to your household.
This idea also works wonderfully when you are decorating for a party or event. Initials can identify a family display, while short words such as “BOO” or “EEK” can create a festive sign without requiring a separate decoration.
The biggest advantage is simplicity. Lettering does not require a complicated face or detailed scene. A single well-designed initial can provide plenty of visual impact.
How To Style It
Choose a large pumpkin with a broad front surface. Draw one large block-style initial in the center.
For the cleanest appearance, use thick letters rather than thin cursive. You want the letter to remain recognizable when the pumpkin is illuminated.
Create a three-pumpkin arrangement with one monogram pumpkin surrounded by two plain or lightly decorated pumpkins.
For a farmhouse-style display, pair the carved letter with a wooden crate, neutral mums, plaid ribbon, and warm lantern light.
For a more modern look, choose a monochrome arrangement and use clean geometric lettering.
Extra Carving Tips
Print your desired letter in several sizes before transferring it to the pumpkin. You can then hold the paper against the surface to see which proportion looks best.
Avoid extremely narrow fonts because small openings can weaken the design.
6. Spiderweb Pumpkin Pattern
Quick Benefits
- Creates an instantly spooky appearance
- Great for Halloween parties
- Looks impressive in groups
- Can be simple or detailed
- Pairs well with black-and-white decor
Why It Works
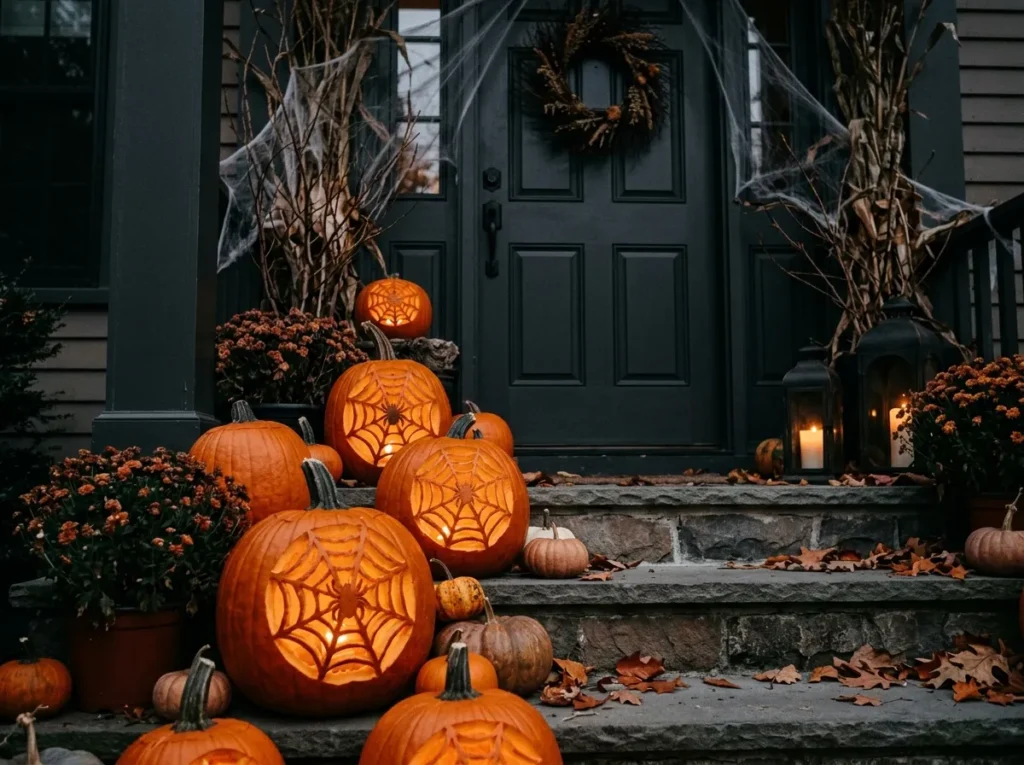
Spiderwebs are visually interesting because the lines naturally spread across the curved pumpkin surface. They also make excellent repeating patterns, allowing you to create a collection that looks connected.
A spiderweb does not have to cover the entire pumpkin. One large web on the front with a small carved spider can be enough.
This idea works especially well when you want a traditional Halloween mood without relying on a giant scary face.
How To Style It
Choose a round pumpkin with a broad surface. Draw a large web beginning near the center and extending outward.
Use curved lines to create the web structure rather than trying to make every section perfectly symmetrical. Add one simple spider shape in the middle or slightly to one side.
For a dramatic display, carve three pumpkins with webs that differ slightly in size.
Place them against a dark background, such as a black door, dark railing, or shaded porch corner.
Add faux cobwebs sparingly around the surrounding area, but avoid covering the carved pumpkin itself so the design remains visible.
Extra Carving Tips
Keep the web lines slightly thicker than you think you need. Thin sections can break during carving or become difficult to see at night.
A pencil or washable marker works well for transferring your sketch before you begin.
7. Toothless Grin Pumpkins
Quick Benefits
- Makes a strong visual statement
- Fun alternative to standard faces
- Easy to personalize
- Works well with large pumpkins
- Looks great in nighttime photos
Why It Works
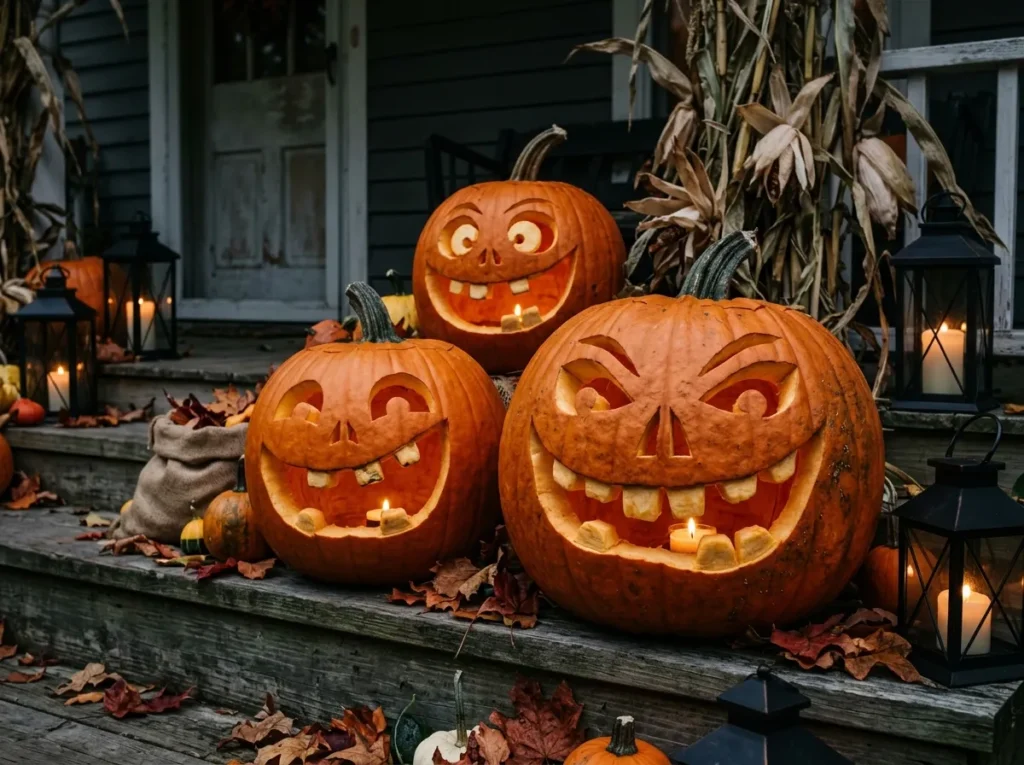
An oversized grin gives a pumpkin plenty of personality without requiring a complicated face. You can create a goofy expression, a mischievous smile, or an exaggerated monster grin simply by changing the shape of the mouth.
The mouth can also become the main focal point, especially if you keep the eyes small or skip them entirely.
This style is perfect for anyone who wants something playful and slightly creepy at the same time.
How To Style It
Choose a large pumpkin with a wide front surface. Sketch an exaggerated smile that extends toward the sides.
Add several uneven teeth rather than making them perfectly identical. Different sizes create a handmade character.
For a spooky look, pair the grin with small triangular eyes and angled brows.
For a playful family design, create a wide smile with rounded or oversized teeth.
Arrange the finished pumpkins along a porch step or low wall. Vary the heights so the grinning faces are easy to see.
Extra Carving Tips
Leave sufficient pumpkin material around the mouth. A very large opening can weaken the front wall.
Use the natural curve of the pumpkin to your advantage. A wide smile can look even more expressive when it follows the rounded shape.
8. Leaf And Vine Carving
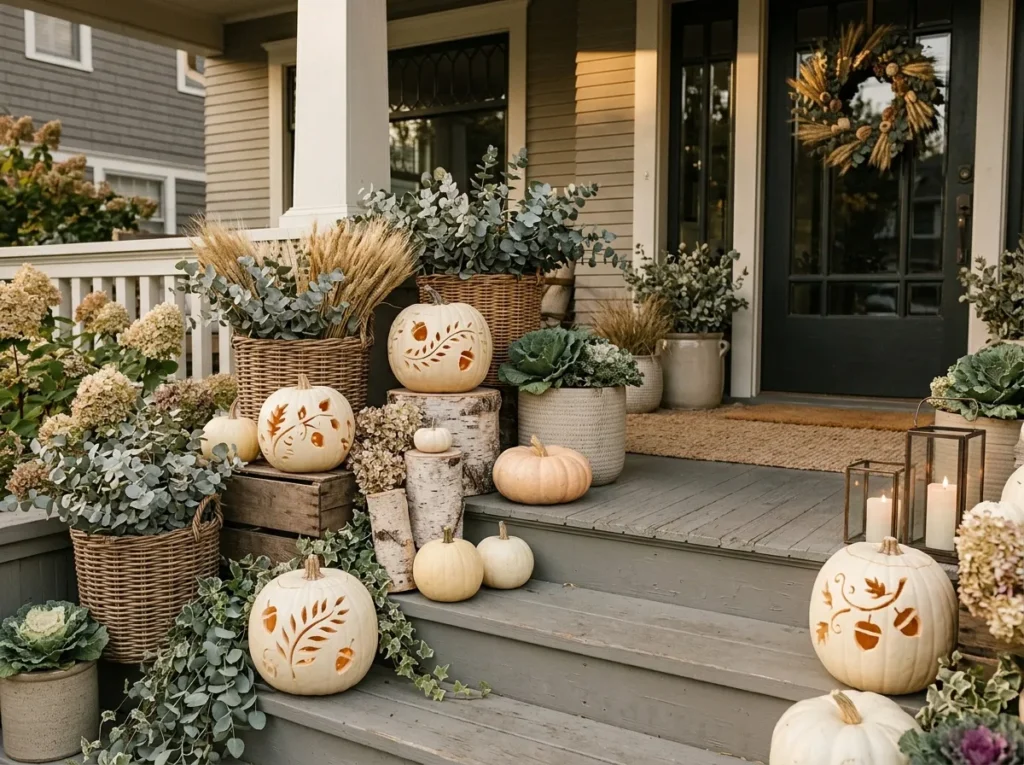
Quick Benefits
- Blends Halloween with autumn decor
- More elegant than traditional spooky designs
- Works beautifully with neutral pumpkins
- Great for sophisticated front porches
- Can remain seasonal beyond Halloween
Why It Works
Not everyone wants frightening faces or dramatic Halloween imagery. Leaf and vine patterns offer a softer alternative that celebrates the season while still incorporating the artistry of carving.
This is an especially attractive choice for homes where autumn decor continues from September into Thanksgiving. The pumpkin still feels festive for Halloween, but the natural pattern is not limited to one holiday.
The curved lines of leaves and vines also work beautifully with the rounded shape of the pumpkin.
How To Style It
Sketch a simple vine that travels across the front of the pumpkin. Add a few leaves along the stem.
You can use a single large botanical motif or repeat smaller leaves around the entire surface.
Pair the carved pumpkin with dried wheat, eucalyptus, acorns, neutral ceramic pots, and woven baskets.
For an elegant outdoor display, use cream or pale pumpkins with subtle natural carving patterns.
Inside, place a leaf-carved pumpkin on a dining table alongside linen napkins and rustic wood serving pieces.
Extra Carving Tips
Keep botanical shapes fairly bold. Extremely thin stems may snap during carving.
Use the pumpkin’s natural grooves to guide your vine placement. Curving the pattern slightly around the pumpkin often creates a more dimensional look.
9. Ghostly Pumpkin Faces
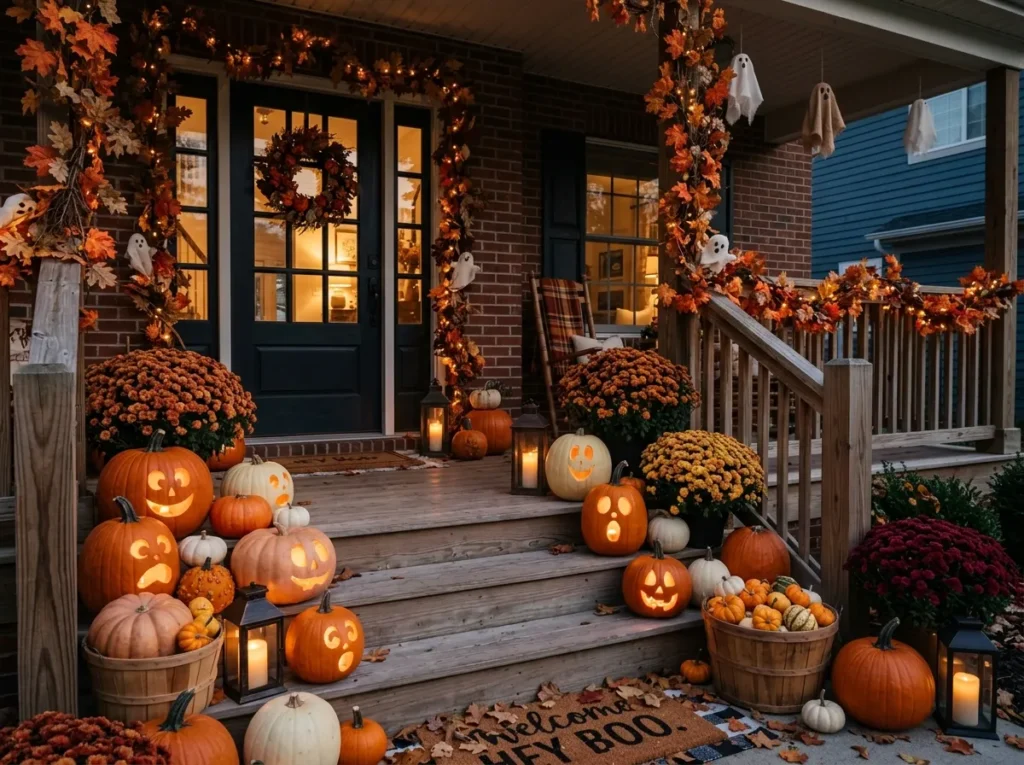
Quick Benefits
- Great for children and families
- Simple spooky design
- Easy to recognize at night
- Works with multiple pumpkin sizes
- Creates a playful Halloween collection
Why It Works
Ghost-inspired designs are wonderfully flexible because they can be cute or spooky depending on the expression. A simple pair of dark eyes and an open mouth can transform an ordinary pumpkin into a glowing Halloween character.
This is also one of the easiest options for children who want something beyond a traditional jack-o’-lantern but may not be ready for complicated patterns.
The design can be repeated across several pumpkins, with small changes to each face making the collection feel lively.
How To Style It
Choose white, cream, or orange pumpkins depending on the overall look you want.
For a ghostly white display, keep the carvings simple and use warm internal lighting. The combination of a pale exterior and glowing dark openings can look surprisingly atmospheric.
For traditional orange pumpkins, use large oval eyes and an open mouth.
Arrange several ghost faces in a group on the porch, with the smallest pumpkins toward the front.
Add a few subtle ghost-themed decorations nearby, but keep the display visually balanced.
Extra Carving Tips
Simple faces work best for beginners because there are fewer narrow pieces to break.
Before lighting the pumpkins, inspect all carved edges and remove loose fragments so the design appears clean and polished.
10. Geometric Cutout Style
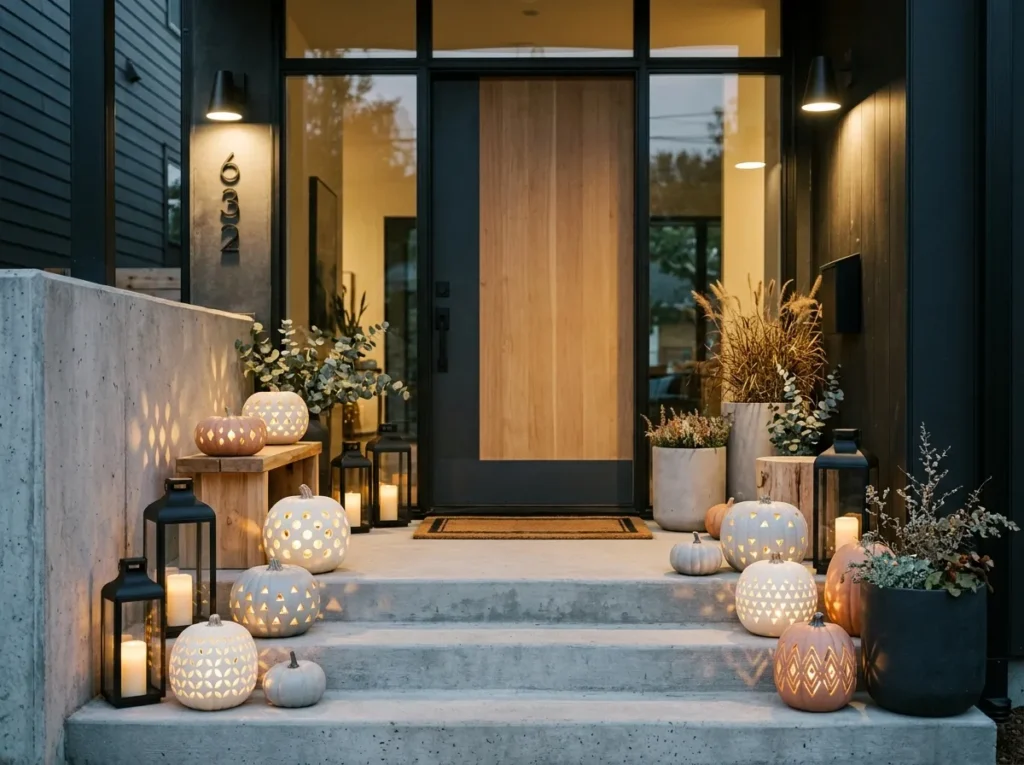
Quick Benefits
- Perfect for modern homes
- Easy to customize
- Works with simple tools
- Creates beautiful light patterns
- Great for minimalist Halloween decorating
Why It Works
Geometric designs prove that Halloween decorating does not have to be overly themed. Circles, diamonds, triangles, lines, and repeating shapes can turn a pumpkin into a sculptural lantern.
This style is particularly effective for contemporary homes because the pattern can complement clean architecture and simple outdoor furniture.
It also allows you to create visual interest without relying on faces, characters, or traditional Halloween imagery.
The light shining through repeated cutouts becomes part of the decoration, casting little shapes across nearby surfaces.
How To Style It
Start with one geometric pattern and repeat it across the pumpkin. You could use rows of circles, alternating diamonds, simple triangles, or a combination of shapes.
For a minimalist look, use one or two pumpkin colors and keep the surrounding decor restrained.
Group geometric pumpkins with black metal lanterns, smooth ceramic planters, warm wood, and neutral textiles.
If you are decorating indoors, place the pumpkin somewhere where the projected light can be seen against a nearby wall.
For an outdoor arrangement, use several pumpkins with slightly different geometric patterns so the display feels coordinated rather than identical.
Extra Carving Tips
Use a template to keep repeated shapes consistent.
Do not make cutouts so close together that the remaining pumpkin wall becomes fragile. Strong spacing is more important than packing in as many shapes as possible.
How To Choose The Right Pumpkin For Carving
The pumpkin itself can make the carving process easier or harder.
Look for a pumpkin that feels firm and heavy for its size, with no soft spots, deep bruises, or damaged areas. A stable base is especially useful because you want the finished pumpkin to sit securely on a porch, table, or step.
The shape should also match your design.
Round pumpkins are versatile and work well for faces, spiderwebs, stars, and geometric patterns.
Tall pumpkins are excellent for expressive faces, lettering, or designs that benefit from vertical space.
Flat pumpkins can be useful for scenes because they offer a broad carving surface.
Small pumpkins work well for simple cutouts, mini faces, and children’s designs.
Do not feel obligated to choose the largest pumpkin in the patch. A medium pumpkin with the right proportions can be much easier to work with.
How To Prepare A Pumpkin For Carving
Before carving, clean the outside of the pumpkin with a damp cloth and let it dry.
When opening the pumpkin, make the cut carefully and consider whether you want the lid to sit on top traditionally or whether you prefer cutting the opening from the bottom. A bottom opening can make the pumpkin easier to place over a light source, although either method can work.
Scoop out the seeds and stringy material thoroughly. The cleaner the interior, the easier it is to see and position the light.
Scrape some of the inner wall thinner if appropriate, especially behind complicated designs. However, avoid thinning it so much that the pumpkin becomes weak.
For most designs, keeping the structure reasonably sturdy is more important than achieving paper-thin walls.
Pumpkin Carving Safety Tips
Carving is easiest when you work slowly and use tools designed for pumpkins or comparable food-preparation tasks.
Keep the pumpkin stable by placing it on a flat work surface. Never hold the pumpkin in your lap while cutting.
Adults should handle sharp carving tools, particularly when children are participating. Kids can help with planning, drawing, scooping, and decorating.
For lighting, battery-operated LED lights are generally a convenient choice for indoor and outdoor displays because they do not require an open flame.
Never leave a lit pumpkin unattended, particularly around children, pets, dry decorations, or other flammable materials.
For outdoor displays, keep pumpkins in a location where they will not create a tripping hazard.
How To Make Carved Pumpkins Last Longer
Carved pumpkins naturally have a shorter display life than whole pumpkins because cutting exposes the interior to air and moisture.
The best way to extend their usefulness is to start with a healthy pumpkin and keep it in a relatively cool, shaded location.
Avoid unnecessary handling after carving because pressure can damage the cut edges.
Inspect outdoor pumpkins regularly. If you notice significant softening, mold, unpleasant odor, or structural damage, remove the pumpkin.
A carved pumpkin does not need to last for the entire fall season. Many people prefer to carve closer to Halloween so the designs look fresh for parties, trick-or-treating, and Halloween night.
Easy Pumpkin Carving Ideas For Kids
When carving with children, simple shapes are your friend.
Large eyes, wide smiles, stars, moons, hearts, circles, and basic ghost faces are easier to plan than complicated scenes.
You can also divide the creative process into age-appropriate jobs. Younger children can choose the design and decorate the pumpkin with washable markers before an adult handles the carving.
Older children may be able to assist with parts of the process under close supervision, depending on their age and the tools being used.
Another fun idea is to give each family member a pumpkin with a different expression. The collection becomes a little family of characters rather than a row of identical jack-o’-lanterns.
What To Do With Pumpkin Seeds
Do not automatically throw away the seeds after carving.
Cleaned pumpkin seeds can be roasted for a simple seasonal snack, provided the seeds are handled and prepared appropriately.
You can rinse them, dry them thoroughly, season them with salt or other preferred flavors, and roast them according to a reliable recipe.
This turns pumpkin carving into more than a decorating activity. The evening can become a complete fall tradition with carving, decorating, warm drinks, and roasted seeds afterward.
How To Display Carved Pumpkins
A beautiful pumpkin display is usually about arrangement as much as carving.
Start by choosing a focal point. This could be the front door, fireplace, stairway, or porch steps.
Then vary height. Place one or two pumpkins on a sturdy crate or low stand while keeping others on the floor.
Repeat colors and materials to connect the display. Black lanterns, natural wood, dried foliage, mums, and warm textiles can help tie individual pumpkins together.
At night, check the display from the street or sidewalk. A pattern that looks fantastic up close may disappear from a distance, while a simple silhouette may become much more dramatic.
That nighttime test is one of the easiest ways to improve an outdoor Halloween arrangement.
Frequently Asked Questions
What is the easiest pumpkin design for beginners?
A simple jack-o’-lantern face with large eyes and a wide smile is one of the easiest choices for beginners. Basic geometric shapes such as circles, triangles, and stars are also relatively straightforward. Start with larger openings rather than intricate details, and choose a pumpkin with a smooth surface and stable base.
How early should I carve my pumpkins?
For the freshest appearance, many people choose to carve pumpkins fairly close to Halloween rather than weeks in advance. Once carved, the exposed interior can deteriorate more quickly. Weather, temperature, pumpkin condition, and whether the pumpkin is displayed indoors or outdoors all affect how long it remains usable.
How do I choose a pumpkin for carving?
Look for a firm pumpkin without soft spots, deep bruises, or visible damage. Consider the shape as well as the size. Round pumpkins are versatile, tall pumpkins work well for faces and lettering, and flatter pumpkins can provide a broad surface for scenes and silhouettes.
Should I carve the top or bottom of a pumpkin?
Both approaches can work. Cutting the top creates the traditional removable lid, while cutting an opening in the bottom can make it easier to place the pumpkin over a light source and can keep the top surface visually cleaner. Choose the method that best suits your pumpkin and display setup.
How can I make carved pumpkins last longer?
Start with a healthy pumpkin, keep it in a cool and shaded location when possible, avoid unnecessary handling, and monitor it regularly for signs of deterioration. Carving closer to Halloween can also help ensure that your pumpkins look their best for the event you are decorating around.
What can kids safely do during pumpkin carving?
Children can help choose designs, draw patterns, scoop seeds, clean the outside, and decorate the finished pumpkin. Adults should handle sharp carving tools. Keep the pumpkin on a stable surface and make supervision part of the entire activity rather than only the actual cutting.
What lighting is best for carved pumpkins?
Battery-operated LED lights are a convenient option for many displays because they provide illumination without an open flame. Choose a light bright enough to show your design but appropriate for the pumpkin size. Place it securely inside and make sure the finished display does not create a tripping or fire hazard.
Conclusion
Pumpkin carving is one of those Halloween traditions where a simple idea can create a surprisingly memorable result. You do not need professional carving skills or an elaborate pattern to make a pumpkin stand out.
The most successful designs usually begin with a good pumpkin, a pattern that matches its shape, and a little patience during the cutting process.
Classic friendly faces are perfect for family nights, while haunted silhouettes bring a more dramatic feeling to the porch. Star patterns create a glowing night-sky effect, cats and ghosts add playful personality, and geometric designs offer a modern alternative for contemporary homes.
The key is choosing a design that works with your decorating style and the time you actually want to spend carving.
For beginners, start with large simple shapes. For experienced carvers, experiment with silhouettes, layered patterns, or more detailed scenes. And remember that a slightly imperfect pumpkin can be even more charming than a perfectly symmetrical one.
Once your pumpkins are finished, think about how they look as a collection. Vary the heights, use warm lighting, repeat a few colors or materials, and give each design enough space to be noticed.
Most importantly, make the process part of the fun. Put on some fall music, gather the family, save the seeds, and enjoy the messy little ritual that makes October feel like October.
Start with one or two designs this season, then let your collection grow naturally as you discover which carving styles you enjoy most.
Related Articles
- Easy Halloween Decorating Ideas for Your Front Porch
- Best Halloween Crafts for Kids and Families
- Cozy Fall Front Porch Decorating Ideas
- Simple Halloween Party Ideas for Adults
- Creative Fall Outdoor Decorating Ideas
Pinterest Image Prompts
1. Classic Friendly Faces
Image Description: A charming American suburban front porch decorated with several carved pumpkins featuring friendly, expressive jack-o’-lantern faces, including wide smiles, playful eyes, and uneven teeth. Warm battery-powered lights glow inside the pumpkins. Surround them with autumn mums, natural wood crates, a neutral doormat, black lanterns, and subtle fall foliage. Photograph from a low three-quarter angle at dusk with warm evening light, realistic textures, inviting Halloween atmosphere, and strong Pinterest-worthy curb appeal.
2. Haunted Silhouette Shapes
Image Description: A dramatic Halloween porch featuring large pumpkins carved with haunted house, crooked tree, crescent moon, and flying bat silhouettes. The pumpkins glow warmly against a dark evening background, surrounded by black lanterns, dried branches, muted autumn foliage, and rustic wooden accents. Capture from sidewalk level at dusk, emphasizing the glowing silhouettes and nighttime shadows. Rich autumn tones, realistic residential styling, mysterious mood, cinematic but approachable Pinterest aesthetic.
3. Starry Night Designs
Image Description: A beautiful collection of orange and cream pumpkins carved with glowing stars and crescent moon patterns on an elegant fall porch. Warm LED lights shine through dozens of carefully spaced cutouts, creating a magical night-sky effect. Surround the pumpkins with woven baskets, dried wheat, neutral planters, and warm wood details. Photograph during blue hour from a front three-quarter angle, with soft ambient lighting, sophisticated autumn styling, and dreamy Pinterest-worthy atmosphere.
4. Cat Face Carvings
Image Description: Two playful Halloween pumpkins carved as black-cat faces, featuring triangular ears, expressive glowing eyes, tiny noses, and whimsical whiskers. Arrange them on a cozy front porch with dark planters, autumn mums, subtle spiderweb details, black lanterns, and warm wood accents. Capture at dusk from an eye-level three-quarter angle. Use warm orange pumpkin tones, deep charcoal accents, realistic textures, playful spooky mood, and polished Pinterest-friendly composition.
5. Monogram Pumpkin Style
Image Description: An elegant fall entryway featuring three pumpkins arranged in a welcoming display, with one large pumpkin carved with a bold family initial and two smaller pumpkins beside it. Add natural wood crates, cream mums, woven baskets, black metal lanterns, and a simple neutral wreath. Warm evening lighting emphasizes the carved letter. Photograph from a straight-on porch perspective with clean composition, understated autumn colors, personalized seasonal charm, and sophisticated Pinterest aesthetic.
6. Spiderweb Pumpkin Pattern
Image Description: A dramatic Halloween display featuring round orange pumpkins carved with large intricate spiderweb patterns and small central spider silhouettes. The glowing pumpkins sit against a dark front door with subtle faux cobwebs, black lanterns, dried branches, and muted autumn leaves. Photograph at dusk from a slightly low angle to emphasize the illuminated patterns. Use realistic pumpkin textures, warm internal lighting, deep shadows, traditional Halloween atmosphere, and eye-catching Pinterest-worthy styling.
7. Toothless Grin Pumpkins
Image Description: A playful porch arrangement featuring three large pumpkins with exaggerated wide grins, irregular teeth, expressive eyes, and mischievous Halloween personalities. The pumpkins glow warmly against a dark evening backdrop with black lanterns, rustic wooden steps, dried corn stalks, and autumn foliage. Capture from a low eye-level angle so the carved faces dominate the composition. Use realistic orange pumpkin textures, warm lighting, playful spooky mood, and bold Pinterest-ready Halloween styling.
8. Leaf And Vine Carving
Image Description: An elegant autumn porch featuring cream and pale orange pumpkins carved with graceful leaf and vine patterns. Surround the pumpkins with dried wheat, eucalyptus, natural wood, woven baskets, muted green foliage, and neutral ceramic planters. Soft golden-hour light highlights the carved botanical details before dusk. Photograph from a slightly elevated three-quarter angle with sophisticated warm neutrals, organic textures, refined fall styling, and a calm Pinterest-worthy seasonal mood.
9. Ghostly Pumpkin Faces
Image Description: A fun family Halloween porch filled with orange, cream, and white pumpkins carved with simple ghost faces, featuring glowing oval eyes and playful open mouths. Add mums, a woven basket, black lanterns, subtle ghost decorations, and warm autumn foliage. Photograph at dusk from a front three-quarter angle, showing multiple pumpkin sizes and expressions. Soft warm lighting, realistic materials, cheerful spooky mood, family-friendly styling, and highly shareable Pinterest composition.
10. Geometric Cutout Style
Image Description: A modern minimalist front porch decorated with sculptural pumpkins featuring geometric cutouts made from circles, triangles, diamonds, and repeating patterns. Warm LED lights shine through the openings and cast subtle shapes on a nearby wall. Surround the pumpkins with sleek black metal lanterns, natural wood, neutral planters, and sparse autumn greenery. Photograph from an eye-level architectural angle at dusk, emphasizing clean lines, warm lighting, modern styling, and sophisticated Pinterest appeal.
Slug
10-pumpkin-carving-ideas
Meta Description
Discover 10 pumpkin carving ideas for Halloween, from friendly jack-o’-lantern faces and spooky silhouettes to stars, cats, ghosts, and modern patterns.
Tags
- pumpkin carving ideas
- Halloween pumpkin carving
- jack o lantern ideas
- easy pumpkin carving ideas
- Halloween decorations
- Halloween porch decor
- carved pumpkin ideas
- pumpkin carving for beginners
- pumpkin carving for kids
- creative Halloween ideas
- spooky pumpkin ideas
- cute pumpkin carving ideas
- Halloween DIY
- fall decorating ideas
- Halloween outdoor decor
- jack o lantern designs
- easy Halloween crafts
- family Halloween activities
- Halloween decorating ideas
- Pinterest Halloween ideas