11 Clean Low Bun Tutorial Short Hair Ideas
Short hair can absolutely create a polished low bun, even when the length feels too limited at first. The secret is not forcing every strand into a perfect round shape; it is choosing the right base, using smart pin placement, and working with the natural length you already have. For USA readers searching for easy…
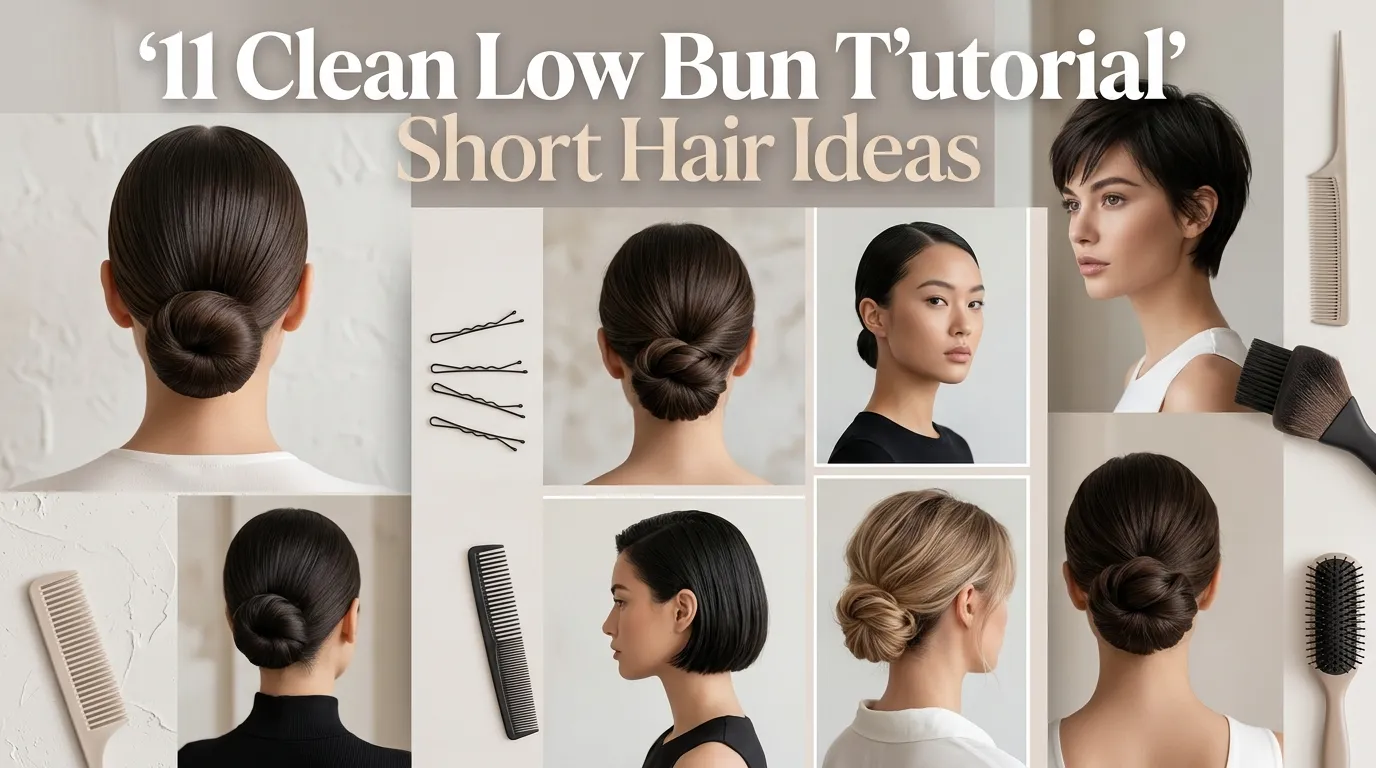
Short hair can absolutely create a polished low bun, even when the length feels too limited at first. The secret is not forcing every strand into a perfect round shape; it is choosing the right base, using smart pin placement, and working with the natural length you already have. For USA readers searching for easy formal hair, work hairstyles, wedding guest looks, school-event styles, or quick everyday polish, a Clean Low Bun can feel neat, modern, and surprisingly achievable with the right tutorial steps.
The best short-hair bun ideas usually rely on small sections, strong elastics, texture spray, smoothing cream, and bobby pins placed with purpose. You do not need waist-length hair or a salon appointment to create a refined finish. These ideas are designed for bob cuts, lobs, shoulder-length hair, layered short hair, and fine hair that needs extra grip. Each section gives a practical way to build shape, control flyaways, and make a low bun look intentional instead of rushed.
1. Tucked Mini Bun
- Best for bob-length hair, lobs, and shorter shoulder-length cuts.
- Use a small elastic, bobby pins, smoothing cream, and light hairspray.
- Creates a polished low shape without needing a full round bun.
- Works well for workdays, brunch, interviews, and simple formal outfits.
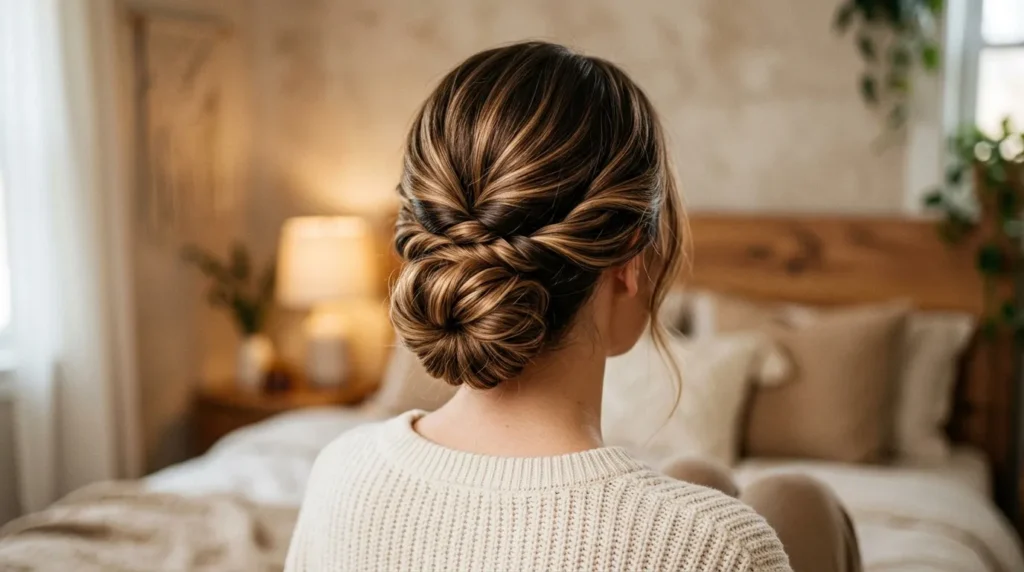
A tucked mini bun is one of the easiest ways to make short hair look polished without pretending it is longer. Start by smoothing your hair toward the nape and securing it with a small elastic. Instead of twisting the ponytail into a large bun, fold the ends under and pin them close to the base. This creates a compact tucked shape that feels neat, clean, and realistic for shorter lengths. Use smoothing cream near the crown so the front looks refined before pinning.
The transformation is subtle but useful because it turns loose short ends into a controlled style that lasts through real life. This bun works well for office outfits, simple dresses, wedding guest looks, and casual days when you want your hair off your neck. If layers fall out, tuck them in with mini bobby pins that match your hair color. In my experience, short buns look best when the shape is small and intentional rather than forced into a bulky style.
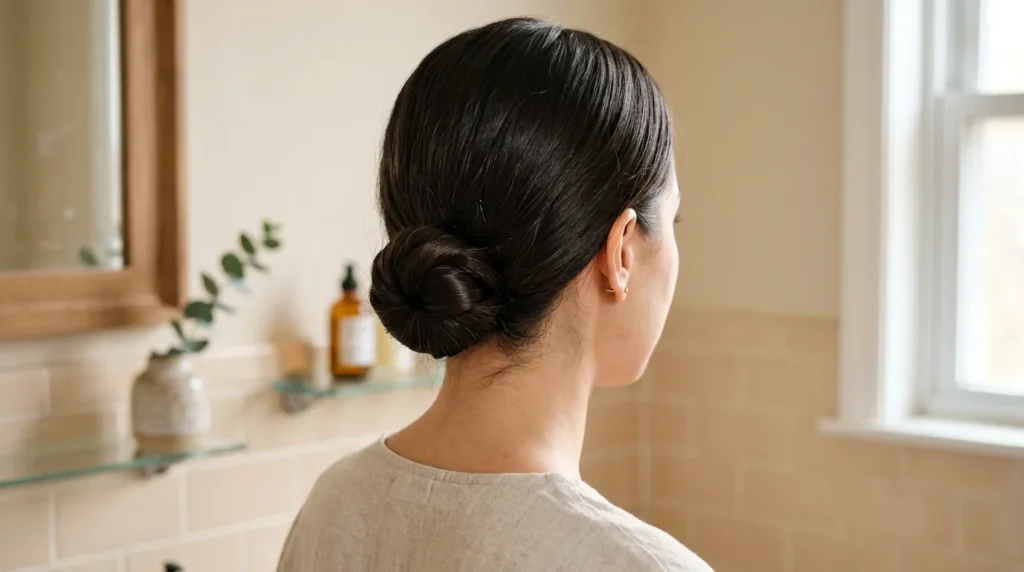
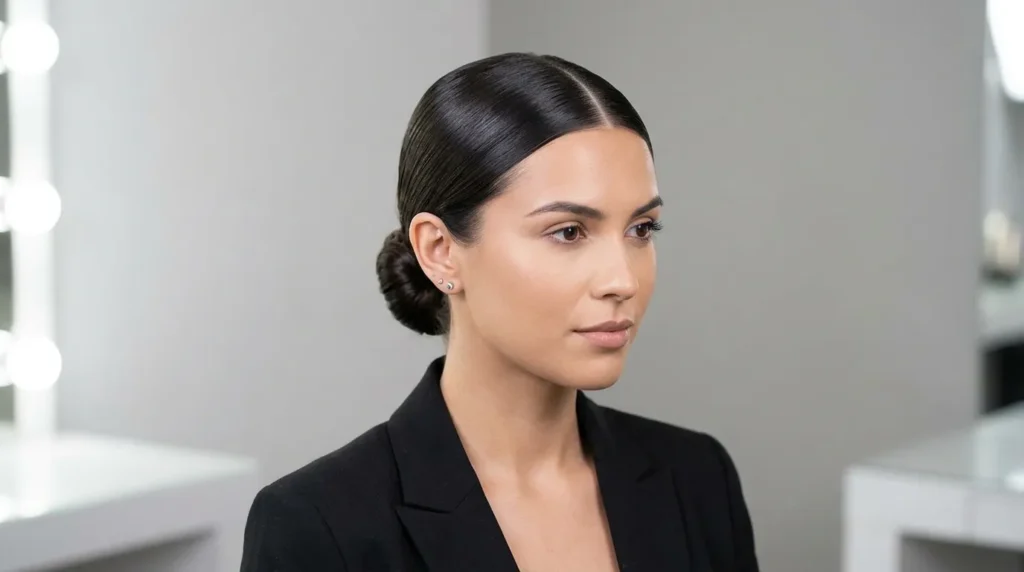
2. Sleek Nape Knot

- Creates a smooth, modern bun placed close to the neckline.
- Best with straight, relaxed, blow-dried, or lightly smoothed hair.
- Use a tail comb, gel cream, strong elastic, and firm pins.
- Perfect for minimalist outfits, formal dinners, and polished everyday styling.
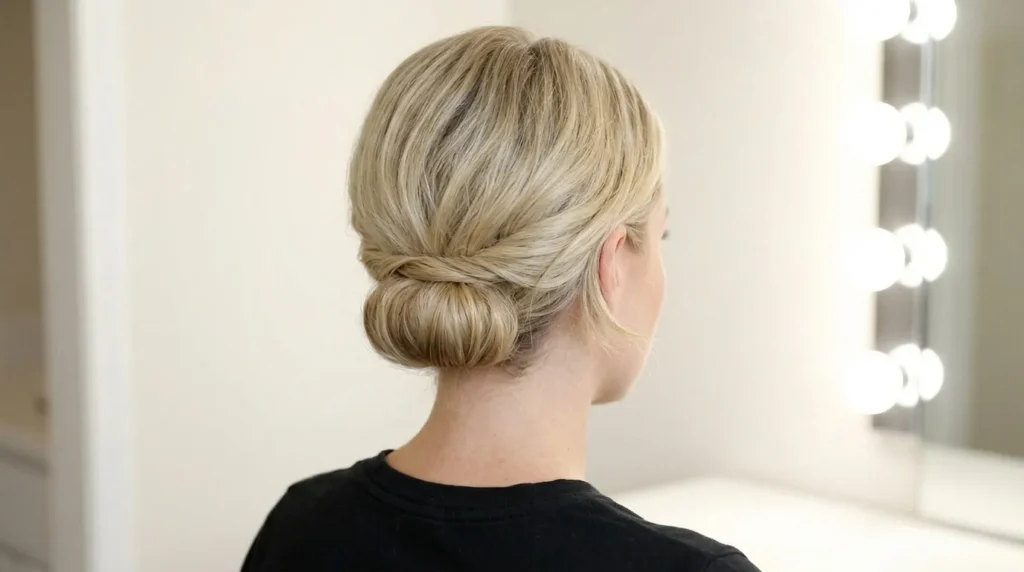
A sleek nape knot gives short hair an elegant finish by keeping everything low, smooth, and close to the head. Begin with a center or side part, then brush the hair back toward the nape using a light gel cream or styling balm. Secure a small ponytail, twist the remaining length once or twice, and pin the ends flat against the base. The goal is not a large bun; it is a clean knot that looks deliberate from the side and back.
The finished style feels modern because the shine and smoothness do most of the visual work. This is especially flattering with high necklines, blazers, fitted dresses, gold hoops, and simple makeup. Use a wax stick around the part and hairline if small pieces lift too quickly. For fine hair, add a little texture spray before smoothing so the elastic has grip. That’s why many stylists recommend combining hold and polish, especially when short hair needs structure without heavy product buildup.
3. Twisted Side Tuck
- Adds soft detail while helping short layers stay secure.
- Works beautifully with side parts, lobs, and face-framing pieces.
- Use texture spray, mini elastics, hidden pins, and flexible hairspray.
- Great for romantic outfits, date nights, and soft formal styling.
A twisted side tuck makes a short low bun feel more styled because the side sections become part of the design. Start by separating two small pieces near the temples, then twist each section back toward the nape. Secure the rest of the hair into a low ponytail, fold the short ends under, and pin them into a small bun. After the base is stable, cross the twisted sections over the bun and pin them discreetly. This adds softness without needing extra length.
The transformation works well for layered short hair because loose pieces can blend into the twists instead of falling randomly. It also creates a pretty back detail for photos, which makes the style useful for weddings, dinners, and school events. If the twists look thin, gently pull them wider before pinning. Use flexible hairspray so the detail stays soft rather than stiff. I’ve noticed this style looks especially flattering when two small front pieces are left loose near the cheekbones.
4. Bobby Pin Roll
- Ideal for short hair that cannot wrap into a full bun.
- Uses multiple bobby pins to create a rolled low shape.
- Works with fine hair, layered cuts, and chin-to-shoulder lengths.
- Creates a neat tutorial-friendly style with very little heat styling.
A bobby pin roll is perfect when your hair is too short to twist into a traditional bun. Start by gathering the back section at the nape and rolling the ends upward toward the head. Hold the roll in place with one hand, then slide bobby pins horizontally and diagonally until the shape feels secure. The style creates the appearance of a soft low bun, but it is actually a tucked roll. This makes it practical for short hair, layers, and fine textures.
The result feels polished because the roll hides short ends while giving the back of the head a smooth, finished shape. This is a smart option for formal events, work meetings, or last-minute plans when you do not want heat styling. Use dry texture spray before rolling if your hair is slippery, and choose pins close to your hair color. For a softer finish, loosen the crown slightly after pinning. The style should feel secure but not painfully tight around the nape.
5. Claw Clip Base
- Helps short hair hold a low bun shape with less pinning.
- Works with mini claw clips, matte clips, clear clips, or neutral resin clips.
- Great for second-day hair, casual outfits, and quick polished styling.
- Adds hidden support under the bun for layered or slippery hair.
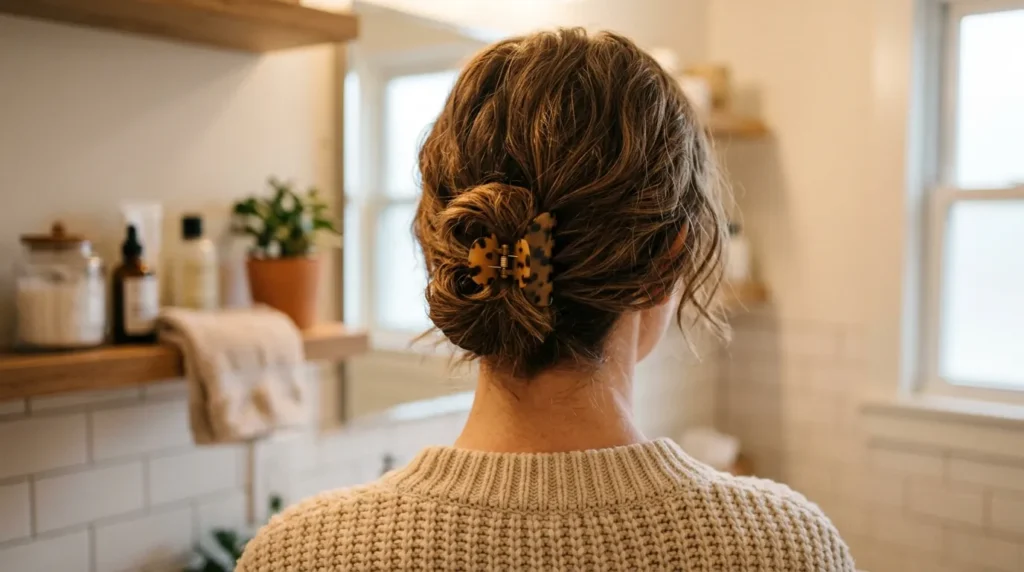
A claw clip base makes short hair easier to style because the clip gives structure before the bun is shaped. Gather the hair low at the nape, twist it gently, and secure the twist with a small claw clip close to the scalp. Then tuck the remaining ends around or under the clip and pin them lightly. The clip acts like hidden scaffolding, helping the bun stay lifted without requiring long hair. Choose a small neutral clip if you want the finish to look clean.
The transformation is practical for busy mornings because it gives short hair support quickly. This method works especially well on second-day hair, layered lobs, and hair that slips out of regular pins. If you want the clip hidden, choose one close to your hair color and tuck the ends over it. If you want it visible, use a matte black, tortoiseshell, pearl, or clear resin clip. The final look feels relaxed but still neat enough for errands, work, or casual dinner plans.
6. Braided Mini Wrap
- Adds texture and detail to a small low bun.
- Works best with lobs, shoulder-length hair, and longer front layers.
- Use a mini elastic, texture spray, bobby pins, and light hairspray.
- Makes short hair look more styled from the back without heavy accessories.
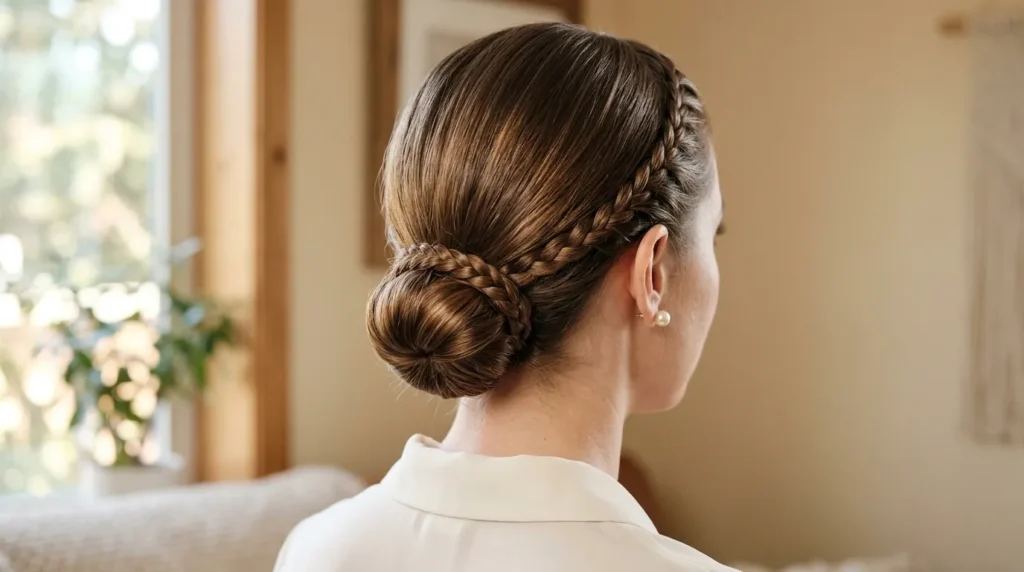
A braided mini wrap gives short hair a polished detail that makes the bun look more intentional. Start by leaving out a small side section before creating a low mini bun at the nape. Braid the loose side section, secure it with a tiny elastic, then wrap or tuck it around the bun base. Even a short braid can add texture and make the style feel finished. Use texture spray before braiding so the strands grip and the braid does not unravel too quickly.
The result looks especially pretty from the back because the braid adds dimension around a small bun shape. This is useful when your hair length limits volume but you still want detail for photos. If your braid is thin, gently pull the edges wider before pinning it. For layered hair, use a touch of styling cream on the braid ends to keep pieces together. The look pairs well with soft sweaters, formal dresses, pearl earrings, and simple makeup because it adds interest without looking overdone.
7. Middle Part Polish
- Creates a balanced, modern look that feels clean and refined.
- Best with short straight hair, lobs, and smooth blowouts.
- Use a tail comb, smoothing cream, wax stick, pins, and shine spray.
- Works for office looks, formal outfits, and minimalist beauty styling.
A middle part polish style makes a short low bun feel sharp, balanced, and modern. Begin by creating a precise center part with a tail comb, then smooth both sides toward the nape. Secure the hair into a low ponytail and fold the ends under into a small bun or tucked knot. The part line is important because it gives the look structure from the front. Use a wax stick lightly along the part and hairline to control flyaways without making the hair greasy.
The finished effect is clean and versatile, especially for minimalist outfits, formal dresses, blazers, and simple jewelry. This style works well when you want a neat bun that does not rely on volume or accessories. If your short layers pop out around the ears, pin them flat before forming the bun. A small amount of shine spray on the outer layer can make the style look more expensive. This is a strong option when you want short hair to feel sleek and deliberate.
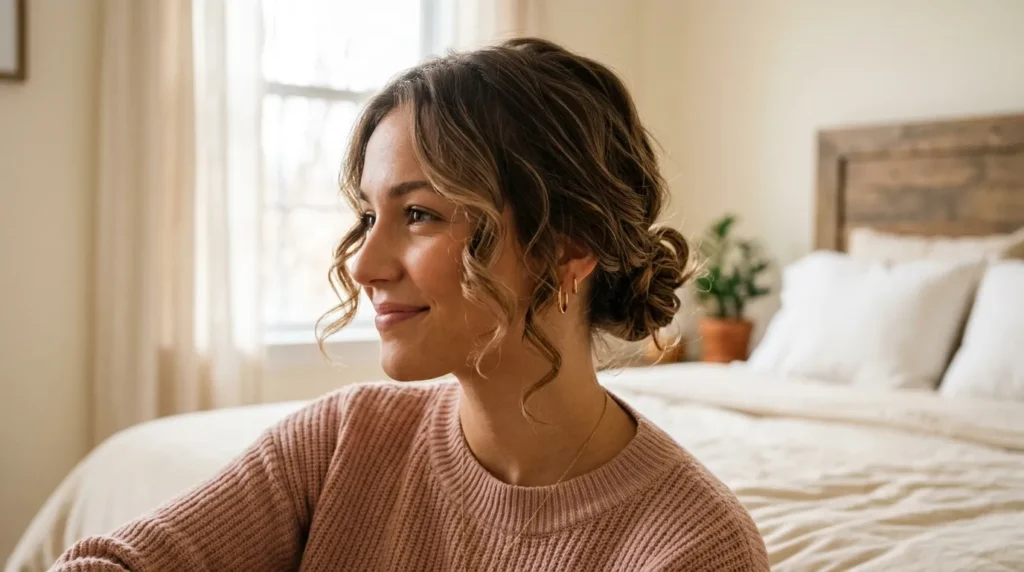
8. Soft Face Pieces
- Adds flattering movement around the face while keeping the bun neat.
- Works with curtain bangs, layers, side bangs, and short front sections.
- Use a curling iron, smoothing cream, mini pins, and flexible hairspray.
- Great for weddings, date nights, photos, and soft everyday looks.
Soft face pieces can make a short low bun feel more flattering because the front shape matters most in photos. Start by pulling the back into a small tucked bun, then leave a few front pieces loose around the cheekbones or jawline. Curl these pieces gently away from the face with a small iron or round brush. Keep the bend soft rather than tight, because short curls can spring up quickly. The bun stays neat while the face-framing pieces add movement.
The transformation feels effortless because the style becomes softer without losing structure. This works beautifully for curtain bangs, layered bobs, grown-out bangs, and short pieces that never reach the bun anyway. Instead of fighting those layers, make them part of the look. Use a tiny amount of smoothing cream on the ends so they separate nicely. The style is useful for photos, weddings, date nights, and everyday outfits because it looks relaxed from the front and polished from the back.
9. Curled Ends Bun
- Helps short ends tuck more easily into a low bun shape.
- Best with a small curling iron, texture spray, pins, and flexible hairspray.
- Adds softness and grip before pinning the hair at the nape.
- Works well for short layered hair that slips out when straight.
A curled ends bun works beautifully for short hair because curled pieces are easier to tuck and pin. Before creating the bun, curl the ends of your hair lightly with a small barrel iron. The curls do not need to be perfect; they simply create bend and grip. Gather the hair low, fold the curled ends under, and pin them into a soft rounded shape. This method helps short pieces blend together instead of sticking out sharply from the bun.
The result is softer than a fully sleek style and more secure than trying to pin straight ends. This idea works especially well for layered lobs, fine hair, and hair that slips out of elastics. Use texture spray after curling so the ends have enough hold. If some pieces escape, curl them again and pin them individually into the shape. In my experience, curled ends make short buns look fuller because the bends create natural volume around the nape.
10. Scarf Wrap Detail
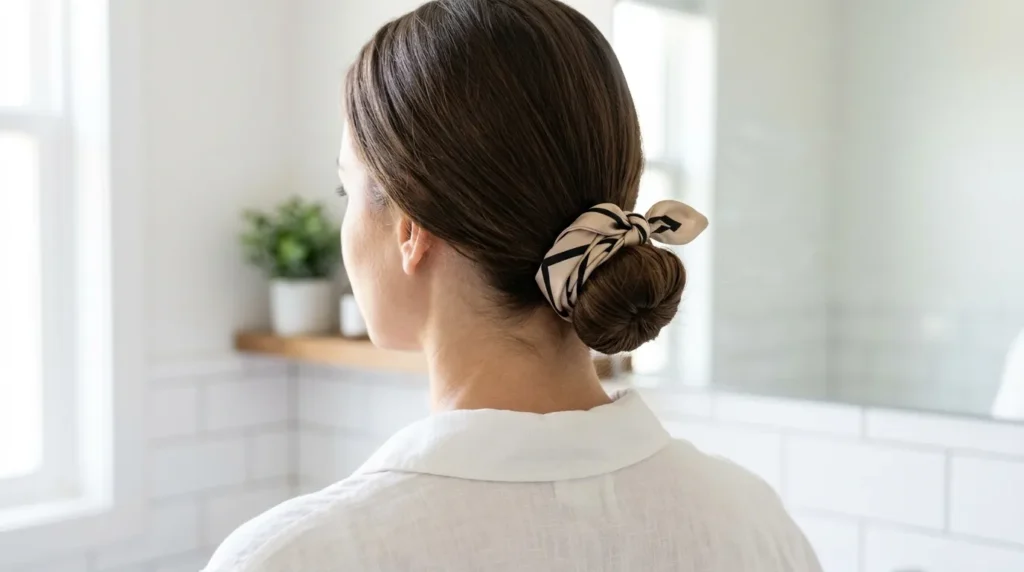
- Adds color, texture, and support to a short low bun.
- Works with silk scarves, satin scarves, narrow ribbons, or printed wraps.
- Great for casual outfits, vacation looks, brunch, and creative styling.
- Helps hide pins, short ends, or uneven layers around the bun base.
A scarf wrap detail turns a small short-hair bun into a complete style with very little effort. Create a low tucked bun first, then fold a narrow scarf and wrap it around the base. Tie it underneath for a cleaner finish or leave a small knot visible for a relaxed look. The scarf hides pins, short ends, and uneven layers while adding color and texture. Silk and satin scarves feel polished, while cotton scarves create a more casual everyday mood.
The transformation is helpful when your bun looks too small on its own or when layers refuse to stay hidden. A scarf makes the style look intentional instead of improvised, which is perfect for brunch, vacations, casual Fridays, and summer outfits. Choose a pattern that connects with your clothes, such as black and white for minimal looks or soft florals for feminine outfits. Keep the scarf narrow so it supports the bun without overwhelming short hair or covering the neckline.
11. Pearl Pin Finish
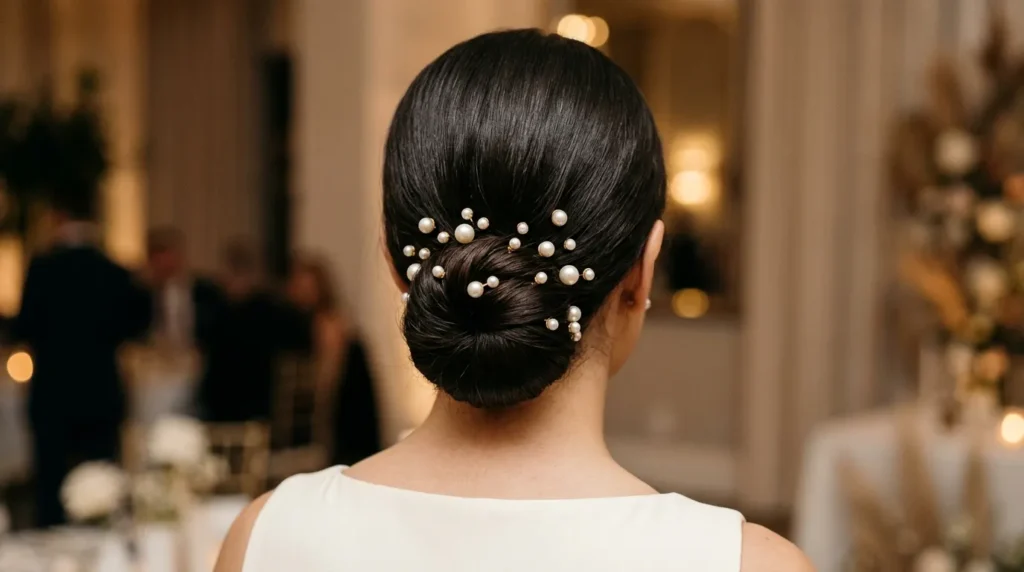
- Adds elegant detail to a simple short low bun.
- Best with pearl pins, mini bobby pins, smoothing cream, and light hairspray.
- Works for weddings, prom, dinner outfits, church events, and formal photos.
- Place pearls unevenly so the finish looks soft, modern, and natural.
A pearl pin finish makes a short low bun look formal even when the actual bun is small. Build your bun first using a tucked, rolled, or twisted method, then add pearl pins around one side of the base. The pearls should decorate the shape, not hold it together. Use regular bobby pins first for structure, then add the pearl pins as the final detail. This keeps the style secure and prevents the accessory from sliding during the day or evening.
The final look feels elegant because the pearls catch light and draw attention to the clean shape at the nape. This is a beautiful upgrade for weddings, prom, dinners, church events, or professional photos. Avoid placing pearls in a perfect line; a slightly scattered arrangement feels softer and more modern. If you want a Clean Low Bun for short hair that looks event-ready, this is one of the easiest finishing touches. It gives simple styling a polished, Pinterest-worthy result.