
Best Cabinet Hardware Jigs for DIY Beginners (Templates Compared)
Choosing the best Cabinet Hardware Jigs for DIY Beginners (Templates Compared) requires balancing ease of use with the precision needed for a professional finish. When you start your first kitchen renovation or furniture update, the fear of drilling a permanent hole in the wrong spot is paralyzing. A reliable hardware jig solves this by acting…

Choosing the best Cabinet Hardware Jigs for DIY Beginners (Templates Compared) requires balancing ease of use with the precision needed for a professional finish. When you start your first kitchen renovation or furniture update, the fear of drilling a permanent hole in the wrong spot is paralyzing. A reliable hardware jig solves this by acting as a guide, ensuring every knob and pull is perfectly centered.
By comparing these templates, you can avoid the frustration of misaligned handles and save significant time on your project. This article will help you identify the right tool for your skill level, ensuring your cabinets look like they were installed by a master carpenter.
If you want the short answer, the Kreg Cabinet Hardware Jig is generally considered the top pick for beginners due to its intuitive design and versatility. It offers a clear, sliding system that makes repeating hole patterns on drawer fronts and cabinet doors incredibly simple.
While professional contractors often use more expensive, heavy-duty metal systems, the plastic-based jigs from reputable brands provide more than enough accuracy for home projects. Investing in a quality jig will save you from the costly mistake of ruining a cabinet door, which is why most pros recommend starting with an adjustable template system.
Understanding How Hardware Jigs Function
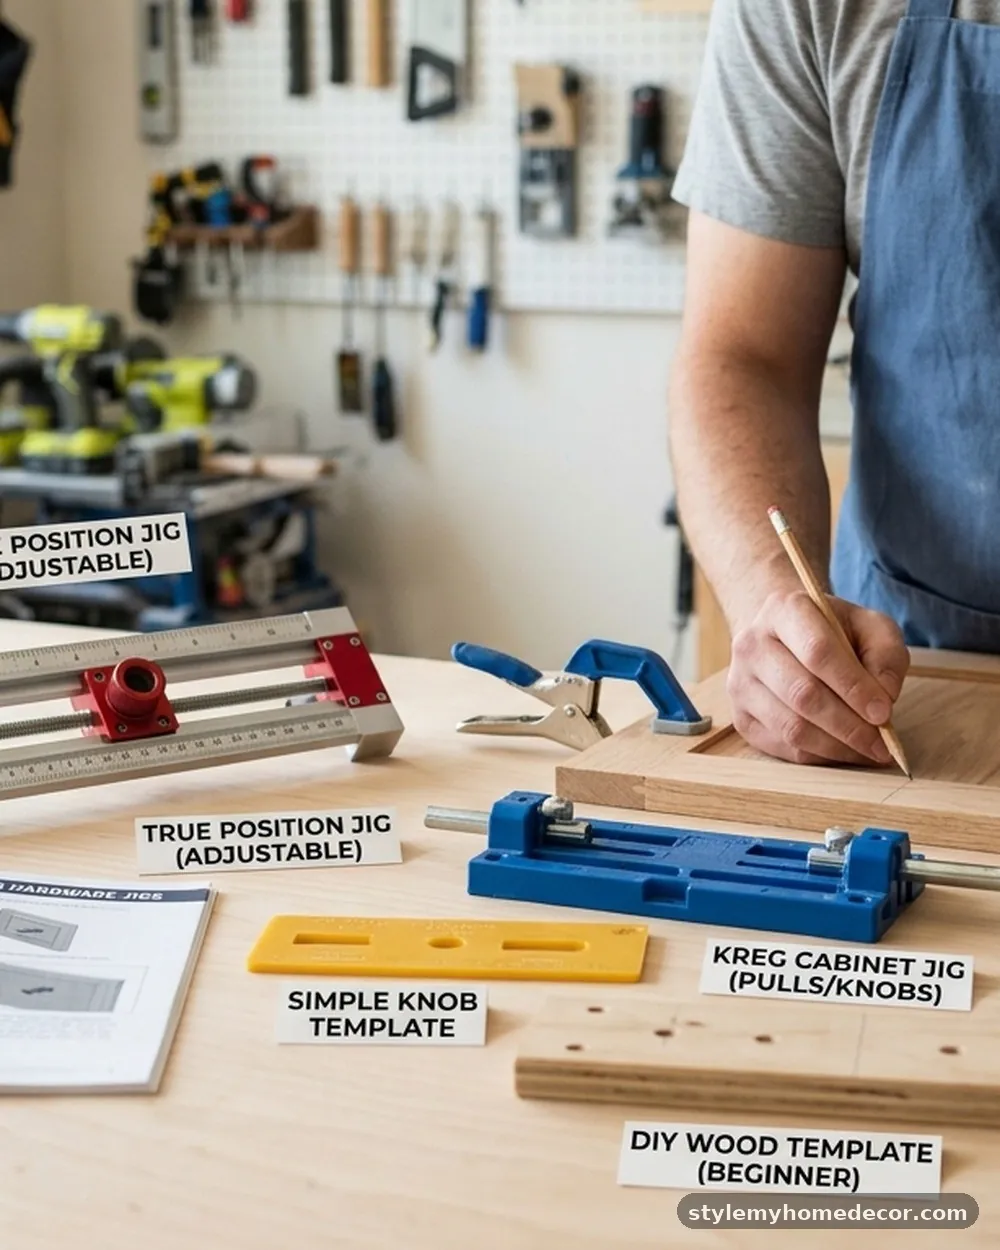
A hardware jig is essentially a physical guide that locks into a specific position, allowing you to drill holes consistently. Without one, you are forced to measure every single hole manually with a tape measure and a pencil.
Even with extreme care, the human eye often misses slight deviations, leading to handles that look tilted or uneven. A jig eliminates this human error by providing a fixed stop for your drill bit.
The core of any jig is the drill guide, which is usually a hardened steel bushing that prevents your drill bit from wandering. When you place the jig against the edge of a door, the bushings guide the bit exactly where it needs to go.
This ensures that every handle on your cabinets matches perfectly, creating a uniform look across your entire kitchen. Using a tool like this turns a stressful measuring task into a quick, repeatable process.
Key Features to Look for in a Template
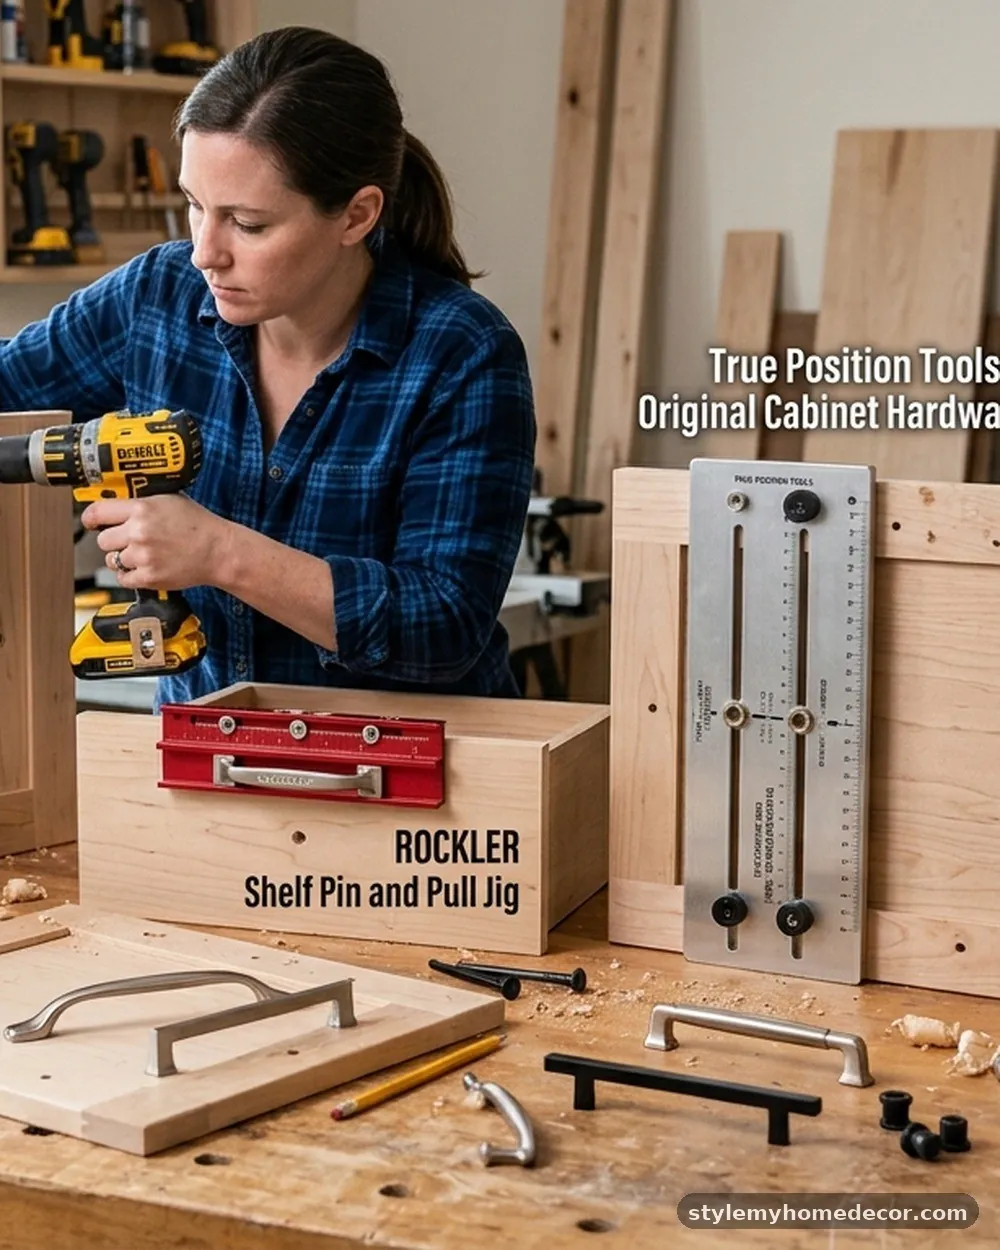
When shopping for the best Cabinet Hardware Jigs for DIY Beginners (Templates Compared), look for adjustability as your primary requirement. Cabinets come in various sizes, and hardware placement can shift based on the style of the handle or knob.
A good jig should allow you to slide the drill guides horizontally and vertically to accommodate different center-to-center measurements. Look for a system that can handle both standard 3-inch pulls and wider modern handles.
Durability is another factor, though you don’t necessarily need an industrial-grade steel unit for a few dozen doors. Most beginner-friendly jigs use high-impact, glass-filled nylon that holds up well for multiple projects without warping.
Check if the jig includes clear markings or a scale for quick adjustments. A tool that requires you to use a separate ruler to set the distance is much more tedious than one with built-in measurements.
Comparing Popular Beginner Jig Models
There are several market leaders that dominate the DIY space for hardware installation. Most beginners gravitate toward brands like Kreg, Rockler, or generic alternatives found on sites like Amazon.
While the basic concept remains the same, the execution varies significantly between models. Some rely on a single, long bar, while others use a T-square design that hangs over the edge of the door.
The following table highlights how these common types of jigs compare in terms of features and typical user experience:
| Jig Type | Ease of Use | Best For | Precision |
|---|---|---|---|
| Bar-Style Jig | High | Large Kitchens | Excellent |
| T-Square Jig | Medium | Individual Doors | Good |
| Adjustable Template | High | Drawers & Doors | Very High |
| Fixed Plastic Template | Very High | Simple Knobs | Moderate |
The Importance of the 1/3 Rule

Hardware placement is often dictated by aesthetic guidelines, with the 1/3 rule being the most common standard. This rule suggests that the hardware should be positioned about one-third of the way down from the top of the cabinet door.
For drawers, the hardware is typically placed in the center of the drawer front for a balanced, modern look. Using a jig that supports these common offsets makes the design process much faster.
If you deviate from this rule, you risk making the hardware look awkward or out of proportion. For instance, placing a handle too low on a tall upper cabinet can make it difficult to reach comfortably.
Most reputable jigs come with pre-set stops that align perfectly with standard cabinet dimensions. This takes the guesswork out of the design phase, allowing you to focus on the actual installation.
Setting Up Your First Installation
Before you touch your cabinets, spend time setting up your jig on a scrap piece of wood. This is a critical step that prevents you from making mistakes on your actual furniture.
Adjust the drill guides on the jig to match the center-to-center distance of your handles. Once you have the position locked, drill a hole in the scrap wood and test the fit of your handle.
If the handle fits perfectly, you are ready to move to the real cabinet. If it is too tight or loose, adjust the guides slightly until the fit is perfect.
You will find that most hardware requires a 5mm or 3/16-inch drill bit, but always check the manufacturer’s instructions included with the handles. Keeping a consistent setup process ensures that every single door in your home looks identical.
Avoiding Common Drilling Mistakes
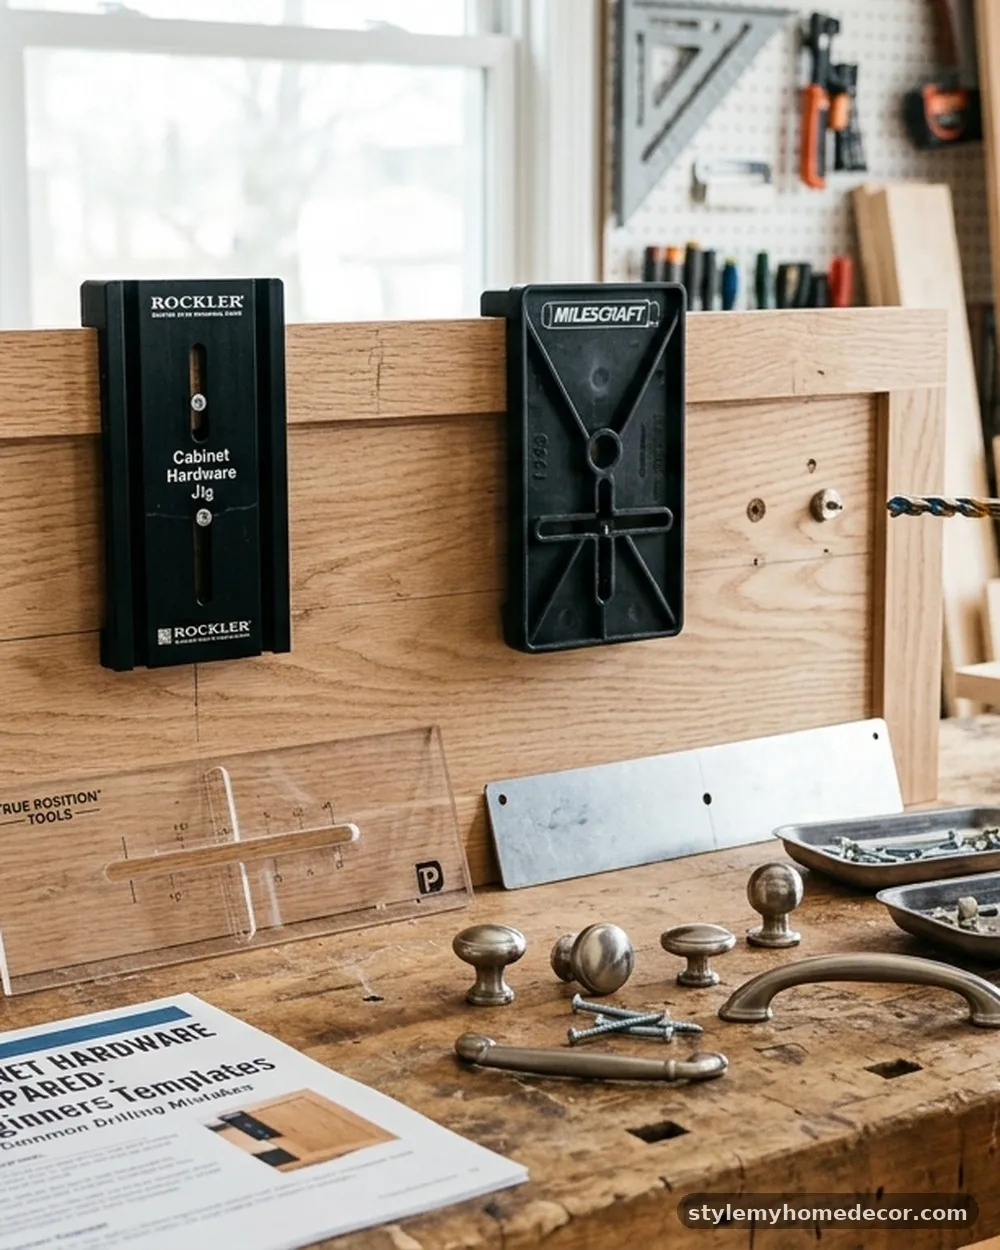
The biggest error beginners make is not holding the jig firmly against the cabinet edge. If the jig shifts while you are drilling, the hole will be off, and the handle will not sit flush.
Always use a clamp if the jig allows for it, or use firm hand pressure to keep the tool from moving. It is also vital to keep the drill perpendicular to the surface.
If you angle the drill, the hole will be oval-shaped on the inside of the cabinet, which can weaken the connection. Another mistake is drilling all the way through without checking what is on the other side.
Ensure there are no obstructions like hinges or internal shelves that could be damaged by the drill bit. For more technical details on woodworking safety, you can consult the OSHA Woodworking Safety Guidelines for best practices.
Choosing Between Knobs and Handles
Deciding between knobs and handles often comes down to personal preference, but it does affect which jig you use. Knobs only require a single hole, making them the easiest to install with almost any template.
Handles require two holes, which means your jig must be able to hold two drill guides at a precise, fixed distance. If you are mixing styles in your home, ensure your jig can accommodate both single-hole and double-hole configurations.
Some beginners prefer to use knobs on doors and handles on drawers. This adds visual interest but requires you to switch your jig settings frequently.
If you choose this route, look for a jig that allows you to lock in two different settings simultaneously or one that is very fast to adjust. Efficiency is key when you have twenty or thirty cabinets to complete in a single weekend.
The Role of Material Quality

While price is always a factor, the material of the jig can impact your longevity. Metal jigs are more durable and less prone to flexing, which is important if you are planning to install hardware for multiple houses.
However, for a single kitchen project, a high-quality polymer jig is usually more than sufficient. These tools are lightweight, which makes them easier to hold in place for long periods.
Check for the quality of the drill bushings. Metal bushings are essential because they prevent the drill bit from chewing into the plastic body of the jig.
If the bushing is just a hole in the plastic, it will wear out after a few uses, leading to inaccurate holes. Always prioritize a design that features replaceable or permanent steel inserts for the drill guide holes.
- Marking Accuracy: Look for clear, etched scales rather than printed stickers.
- Adjustability: Ensure the jig can handle widths from 3 inches up to 10 inches.
- Clamping Capability: A jig with an integrated clamp is vastly superior for one-person jobs.
- Storage: A compact design that fits in a small toolbox is a major plus for apartment dwellers.
- Versatility: Ability to switch between standard and metric measurements is highly useful for imported hardware.
Maintenance Tips for Your Jig
Even the best Cabinet Hardware Jigs for DIY Beginners (Templates Compared) need a little care to stay accurate. After every project, wipe the jig clean of sawdust and debris.
If you used a pencil to mark the cabinet surface, ensure the jig isn’t covered in graphite or lead dust, which can transfer to your cabinets. Store your jig in a dry, cool place to prevent the plastic from becoming brittle over time.
If you notice the drill guides are becoming loose, check the mounting screws. Most jigs allow you to tighten these components to ensure the tool remains rigid.
If you have been using the jig for years, occasionally check the alignment of the drill guides against a precision square. A few minutes of maintenance will ensure your jig is ready for your next home improvement project.
Advanced Techniques with Basic Tools
Once you master the basic jig, you can start using it for more advanced layouts. For example, some people prefer to mount their handles horizontally on top-hinged cabinets and vertically on standard doors.
A good jig will allow you to rotate the template to match these different orientations. You can also use the jig to create custom spacing for oversized handles that exceed the standard length of the guide.
Experimenting with different placements on a scrap board first is still the best policy. You might find that moving the handle slightly higher or lower creates a better ergonomic feel for your specific family members.
Since you have the jig, you have the freedom to test these variations without any risk. This level of customization is exactly why DIY enthusiasts prefer to install their own hardware.
Frequently Asked Questions
Can I use a cabinet hardware jig on existing holes?
Yes, most jigs can be used to re-align or expand existing holes if you are swapping out old hardware. You may need to use a wood filler to cover the old holes if the new hardware is significantly different in size or placement.
Is the Pro version of a jig worth the extra cost?
Professional versions often include extra features like steel-reinforced bodies and more precise adjustment scales. If you are doing one kitchen, the standard model is usually fine, but if you plan to do multiple projects, the Pro version offers better durability.
How do I prevent the drill bit from splintering the wood?
Always use a sharp, high-quality drill bit and drill from the front of the cabinet toward the back. You can also place a piece of scrap wood firmly against the back of the cabinet door to act as a backer board, which prevents the wood from blowing out when the bit exits.
Do I need a different jig for drawer fronts and doors?
Most modern templates are designed to be universal, meaning they work on both doors and drawer fronts. Some specific models are better suited for drawers, but the best Cabinet Hardware Jigs for DIY Beginners (Templates Compared) are those that handle both seamlessly.
What if my cabinets have a recessed panel?
Recessed panels can be tricky because the jig may not sit flush against the surface. Use a small wooden shim or a piece of cardboard to fill the gap, ensuring the jig stays perfectly level while you drill.
Selecting the right equipment is the most effective way to ensure your kitchen updates look professional. By comparing the various options available, you can find the best Cabinet Hardware Jigs for DIY Beginners (Templates Compared) that fits your budget and specific needs. Whether you choose a simple T-square or an adjustable bar system, the key to success lies in careful measurement and a steady hand.
Do not let the prospect of drilling into your cabinets intimidate you; with the right tool, the process becomes entirely manageable. Take your time, test on scrap wood, and enjoy the satisfaction of completing your own home improvements with confidence. Now that you have the knowledge to pick the perfect jig, you are ready to start your project.