
How to Adjust Sagging Kitchen Cabinet Hinges Using the 3 Adjustment Screws
Learning the process of adjusting sagging kitchen cabinet hinges using the 3 adjustment screws is a vital skill for any homeowner looking to maintain their kitchen’s functionality. Over time, heavy use and daily wear can cause doors to shift, resulting in uneven gaps or rubbing against the cabinet frame. By understanding how these specific screws…
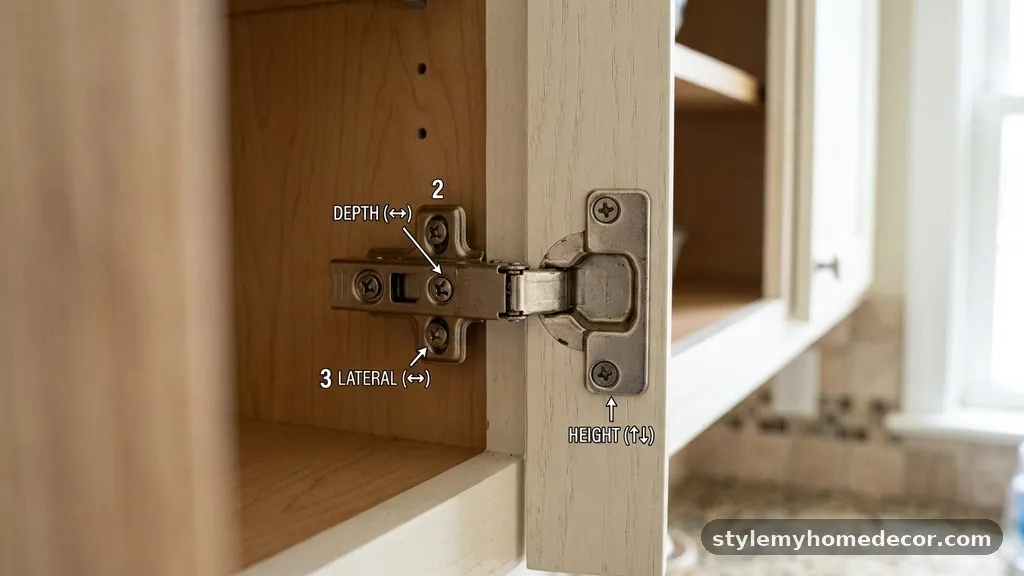
Learning the process of adjusting sagging kitchen cabinet hinges using the 3 adjustment screws is a vital skill for any homeowner looking to maintain their kitchen’s functionality. Over time, heavy use and daily wear can cause doors to shift, resulting in uneven gaps or rubbing against the cabinet frame. By understanding how these specific screws function, you can restore perfect alignment without needing professional help.
This guide explains exactly which screw controls which movement, ensuring you can tackle the task with precision and confidence while saving money on maintenance. Mastering these adjustments will keep your kitchen doors operating smoothly and looking uniform for years to come.
Identify the Three Adjustment Screws
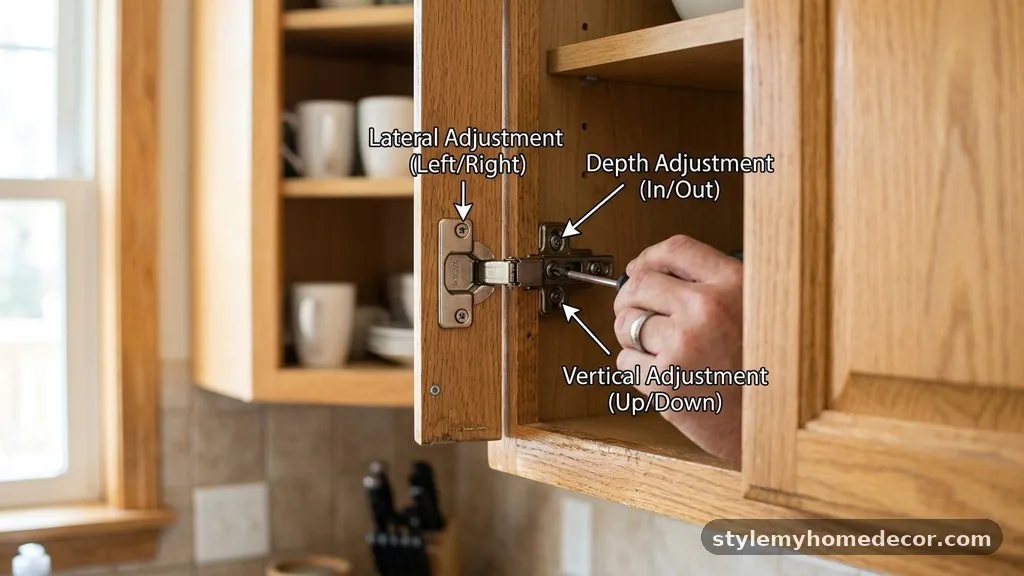
When you open a cabinet door with a European-style concealed hinge, you will typically see three distinct screws on the hinge arm. Each of these components serves a specific purpose in the alignment process. The screw closest to the door itself usually handles the depth adjustment, moving the door closer to or further from the cabinet box.
The middle screw, or the one on the mounting plate, is responsible for the vertical adjustment, allowing you to move the door up or down. The third screw, often located furthest from the cabinet face, manages the side-to-side alignment, which is essential for closing the gap between two doors.
It is helpful to visualize these as a coordinate system for your cabinet door. The side-to-side screw acts as the X-axis, the vertical screw acts as the Y-axis, and the depth screw acts as the Z-axis. By isolating which dimension is “off,” you can avoid turning the wrong screw and making the alignment worse.
Most standard modern hinges, such as those manufactured by Blum, utilize this three-point system to provide a full range of motion. Once you identify these three points, you can begin the process of adjusting sagging kitchen cabinet hinges using the 3 adjustment screws systematically.
Fixing Vertical Sag with the Mounting Plate Screw
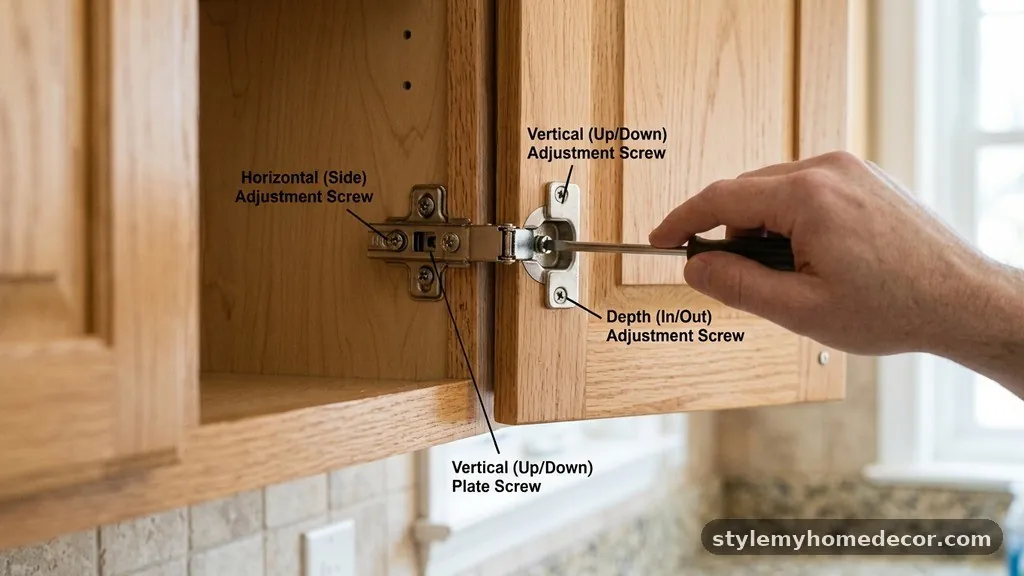
Vertical sagging is the most common issue encountered in busy kitchens. This occurs when the door appears to be drooping, causing it to rub against the bottom of the cabinet or leaving a larger gap at the top. To correct this, you must focus on the screws that attach the hinge arm to the mounting plate.
These screws are typically located on the plate itself, often in elongated slots rather than simple round holes. You will need to loosen these mounting screws slightly on both the top and bottom hinges to allow the door to move.
Once the screws are loose, physically lift the cabinet door to the desired height. Hold it firmly in this position while you tighten the screws back down. It is often helpful to have a second person hold the door in place, as it can be difficult to maintain the perfect height while simultaneously tightening the hardware.
If the door still sags after the first attempt, repeat the process with slightly more lift. This vertical adjustment is the most effective way to eliminate the appearance of a drooping cabinet door.
Adjusting Side-to-Side Alignment
If your cabinet doors are crooked or have an uneven gap between them, the side-to-side adjustment screw is your primary tool. This screw is usually the one located furthest from the door, positioned on the hinge arm itself.
Turning this screw clockwise or counter-clockwise will push the door either toward or away from the cabinet frame. If you have double doors that are clashing in the middle, you will likely need to adjust this screw on both hinges to pull the doors toward their respective outer edges.
Start by making small, quarter-turn adjustments at a time. It is easy to overcompensate, which can cause the door to swing too far and hit the neighboring cabinet. If you find that the top of the door is aligned but the bottom is not, you may need to adjust the top and bottom hinges independently.
By moving the top hinge slightly differently than the bottom, you can “tilt” the door until it hangs perfectly straight. This level of control is what makes the 3-screw system so effective for fine-tuning.
Controlling Door Depth
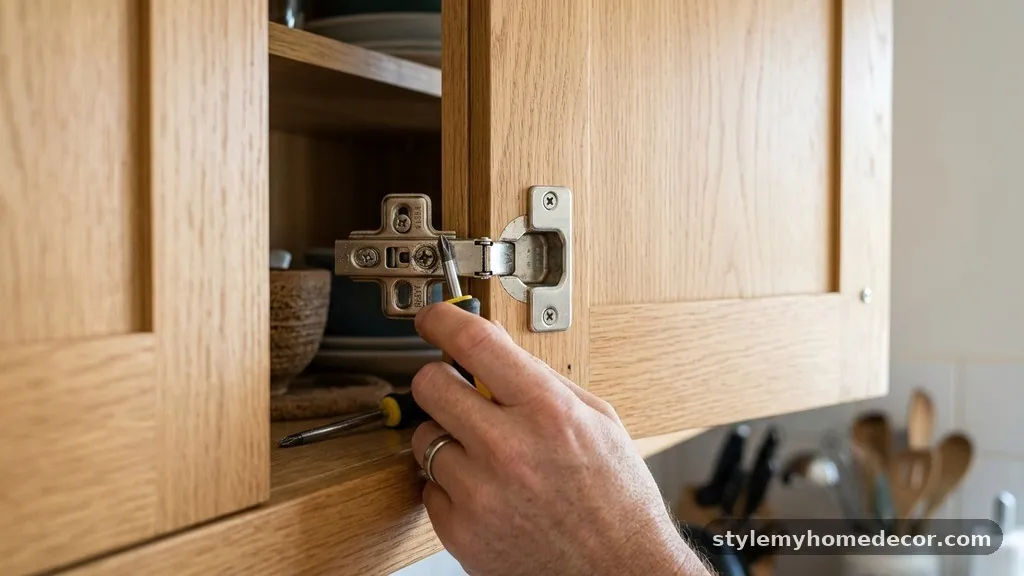
The depth adjustment screw is crucial for ensuring that the cabinet door sits flush against the face frame. If your door sticks out too far or hits the frame before closing completely, this is the screw that needs attention. This adjustment is usually located closest to the hinge cup, which is the part embedded into the door itself.
Turning this screw moves the entire door in or out relative to the cabinet box. This is particularly important for cabinets with soft-close mechanisms, as proper depth ensures the piston engages correctly.
If your door is not closing with a clean, flush look, try turning the depth screw by small increments. You should notice the door moving in or out almost immediately. If the door is rubbing against the side of the cabinet when you try to close it, the depth may be set too deep.
Pulling the door out slightly by adjusting this screw will provide the necessary clearance for a smooth close. Always check that the door is not only flush but also square with the surrounding cabinets after completing this step.
Standard Hinge Adjustment Reference
Understanding the relationship between the screws can be simplified by looking at how they affect the door’s position. While every manufacturer has slight variations, the following table summarizes the typical function of the three standard screws found on most European-style concealed hinges.
| Adjustment Type | Common Screw Location | Primary Effect |
|---|---|---|
| Vertical | On the mounting plate | Moves door up or down |
| Side-to-Side | Front of hinge arm | Moves door left or right |
| Depth | Rear of hinge arm | Moves door in or out |
Keep in mind that these locations can sometimes be reversed depending on the specific model of the hinge. Always observe how the door moves when you turn the screw before making a full rotation.
If you turn a screw and the door moves in an unexpected direction, simply reverse the turn to reset it. This trial-and-error method is perfectly safe as long as you make small adjustments and monitor the door’s position closely.
Tools You Need for the Job
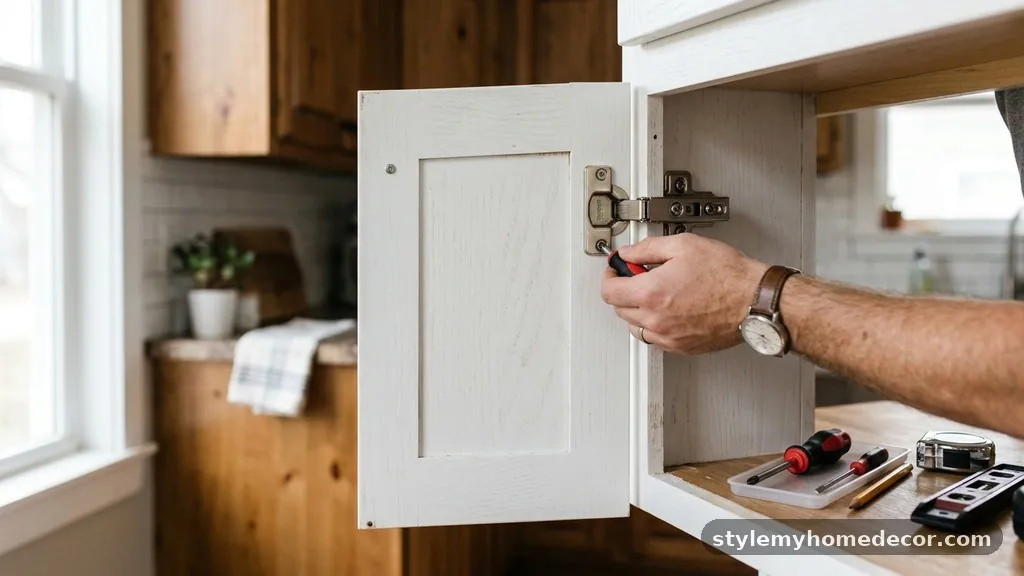
You do not need a specialized toolkit to perform these adjustments, but having the right equipment makes the process much more manageable. A high-quality screwdriver is the most important tool you will use.
Most modern hinges require a standard Phillips head screwdriver, but some older or specific European models may require a Pozi-drive or a flat-head screwdriver. Using the wrong bit can strip the screw head, making future adjustments nearly impossible, so check the screw head carefully before applying pressure.
In addition to a screwdriver, consider these items to ensure a successful project:
- A level to check the vertical and horizontal alignment of the doors.
- A pencil to mark the original position of the hinge if you are worried about losing your place.
- A helper to hold the door at the correct height while you tighten the mounting plate screws.
- A flashlight to better see the screws inside the dark cabinet cavity.
- A small piece of masking tape to mark the current screw position if you are making significant adjustments.
Having these items ready before you start will prevent the frustration of searching for tools with a cabinet door hanging off one hinge. Taking the time to prepare your workspace is a hallmark of good home maintenance.
Troubleshooting Common Hinge Issues
Sometimes, adjusting the screws is not enough because the underlying hardware is loose or damaged. If you tighten a screw and it just keeps spinning, the pilot hole in the wood has likely stripped out. This is a common issue in older cabinets where the wood has softened over time.
You can fix this by removing the hinge, filling the hole with a wooden dowel or a mixture of wood glue and toothpicks, and then re-drilling the pilot hole. This restores the integrity of the wood and allows the screw to grip tightly once again.
Another common issue is a hinge that has lost its soft-close functionality. While this is often an internal mechanical failure, sometimes the hinge simply needs to be cleaned of dust and grease. Use a dry cloth to wipe down the hinge arm and the mounting plate.
If the hinge is completely broken or bent, do not try to fix the internal springs. It is much more efficient to replace the entire hinge with a new unit of the same brand and size.
Maintaining Your Cabinet Alignment
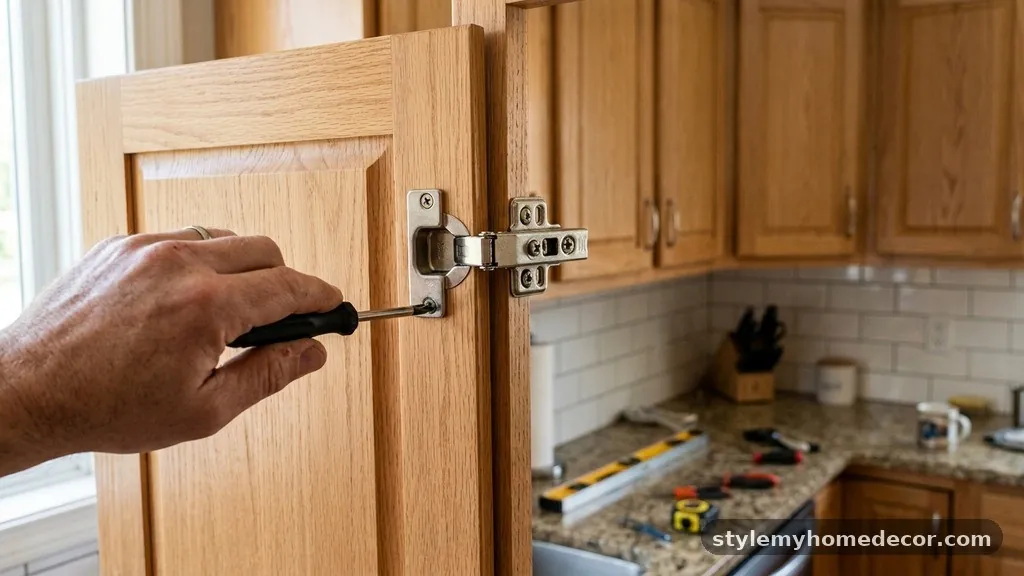
Once you have successfully aligned your doors, you want to keep them that way for as long as possible. Kitchen cabinets endure a lot of stress from the constant opening and closing, as well as the weight of the items stored inside.
Avoid slamming your cabinet doors, as the impact can slowly vibrate the adjustment screws loose over time. If you notice a door beginning to sag again, address it immediately rather than waiting for it to get worse.
Consistency is key to longevity. Check your cabinet alignment once or twice a year as part of a routine home inspection. Tighten any screws that feel loose and ensure the mounting plates are firmly attached to the cabinet box.
By performing these small, preventative checks, you avoid the need for major repairs. A well-maintained kitchen not only looks better but also functions with the precision intended by the manufacturer.
The Impact of Cabinet Weight
The weight of the cabinet door itself plays a significant role in how often you will need to adjust your hinges. Larger, heavier pantry doors or doors with glass inserts are more prone to sagging than smaller, lighter doors.
If you have heavy doors, ensure that you have enough hinges to support the weight. Most standard cabinets use two hinges, but doors taller than 40 inches often require a third or even fourth hinge to prevent sagging.
If you are constantly adjusting the same hinge, the door might simply be too heavy for the current setup. Consider adding an additional hinge if the door feels unstable or if it continues to droop despite correct adjustments.
Distributing the weight across more attachment points reduces the stress on each individual hinge arm. This proactive approach is far more effective than constantly trying to force a single hinge to hold a heavy load.
Frequently Asked Questions
Why does my cabinet door keep sagging after I adjust it?
If the door continues to sag, the mounting plate screws are likely not tight enough, or the wood behind the screw has stripped. Check the mounting plate to ensure it is secure against the cabinet wall. If the screw spins without tightening, you need to fill the hole as described in the troubleshooting section.
Can I use a power drill to adjust these screws?
It is highly recommended that you use a manual screwdriver instead of a power drill. Power drills provide too much torque and can easily strip the heads of the adjustment screws or crack the hinge arm. Manual control allows you to feel the resistance and stop exactly when the door is in the correct position.
How do I know if my hinge is broken or just needs adjustment?
If the hinge arm is physically bent, the spring is snapped, or the metal is cracked, the hinge is likely broken and should be replaced. If the hinge looks structurally sound but the door is simply out of position, it is almost certainly a matter of adjustment. Always try adjusting the 3 screws first before deciding to buy a replacement.
Are all cabinet hinges adjustable in the same way?
Most modern European-style concealed hinges follow the same 3-screw pattern. However, older style hinges, such as those that are surface-mounted or have exposed barrels, function very differently. If your hinges do not have three distinct screws on the arm, you are likely working with a different type of hardware that requires a different approach.
What if I turn the screw and nothing happens?
If turning a screw results in no visible movement, you may be turning the wrong one, or the screw might be at the end of its travel range. Back the screw out slightly and try a different one, or check if the hinge is under too much pressure from a neighboring door. Ensure you are observing the door carefully while turning to catch even small movements.
Final Thoughts on Cabinet Maintenance
Adjusting sagging kitchen cabinet hinges using the 3 adjustment screws is a straightforward process once you understand the function of each screw. By focusing on the vertical, side-to-side, and depth settings, you can achieve a professional-looking finish that makes your entire kitchen feel brand new. Remember to make small, incremental changes and always prioritize manual adjustments over power tools to protect your hardware.
Regular maintenance will prevent future issues and keep your kitchen operating at its best. If you encounter persistent problems, do not hesitate to inspect the mounting plates for stability or consider adding extra support for heavier doors. With these steps, you are well-equipped to handle any alignment challenge that comes your way.